
My Circa steno notebook
September 4, 2008 at 1:46 PM by Dr. Drang
I see that Levenger has introduced a steno notebook to its Circa line of products. As it happens, I made my own Circa steno notebook just a month ago. In this post, I’ll discuss pluses and minuses of Levenger’s notebook and mine.
Disc binding
If you’re not familiar with it, the Circa system—also sold under the Rollabind name—is a set of products that use discs to bind pages together. The discs have thickened edges, and the pages have a set of mushroom-shaped perforations along their binding edges to grab the discs. For me, the value of the Circa/Rollabind system is how it combines two features:
- The covers can be flipped around 360°, as with a spiral- and comb-binding, making the notebook more compact for taking notes in the field.
- Pages can be easily added, removed, and repositioned, as with ring binding.
Side-bound notebooks with this type of binding have been around for a while. I’m quite happy using them at my desk or a conference room table, but they don’t work as well when I’m out in the field, holding the notebook in one hand and writing with the other. The discs along the side seem to get in the way, and the continual repositioning of my hands that results often shifts the paper out of its binding.
I used to use standard, spiral-bound steno notebooks in the field, and although I didn’t like the quality of the paper, the spacing of the lines, the flexibility of the covers, or the permanence of the binding, I did like the size of the paper and the position of the binding along the top edge. So about a month ago, I decided to make my own steno notebook with some spare Circa discs. Had I known that Levenger was planning to come out with a Circa steno notebook, I doubt I would have bothered. In fact, I was somewhat annoyed a few weeks ago—just a week or so after I’d made my steno notebook and before I’d done any field testing of it—to see this video from Patrick Rhone of the work. life. creativity website with a sneak peek of Levenger’s steno pad.
It turned out, though, that I hadn’t really wasted my time. Although Levenger’s steno looks very good—and I may end up getting one when mine wears out—there are enough advantages to a custom-made notebook to have made my time worthwhile.
The Levenger steno notebook
Levenger’s notebook sells for $20. It’s the standard steno size: the pages are 6″ × 9″ and the overall dimensions are 6¼″ × 9⅞″.
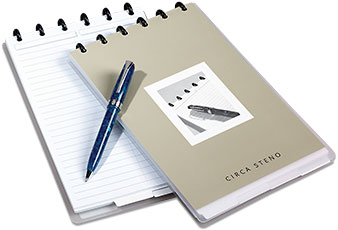
The binding consists of six half-inch discs spaced across the top of the pad.
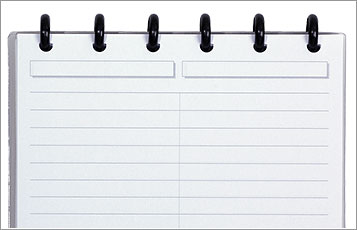
The covers are plastic, and there are four tabs between the covers for organizing different topics. Fifty sheets of Gregg-ruled paper come with the notebook, and Levenger sells refills (of course) for $12 per pack of 50 sheets.
I see two main advantages of the Levenger notebook:
- It’s made by or for Levenger, so the fit and finish will be of high quality.
- The plastic covers will be water resistant and longer-lasting than the cardboard covers of the notebook I made.
The disadvantages are:
- The plastic covers, although durable, don’t seem stiff enough to write on when most of the pages have been removed. I say “seem” because I haven’t touched one yet, but the covers did flex easily in Patrick Rhone’s video.
- The Gregg-ruled paper is of little value to me. I’ll be putting my own paper in the notebook, so for $20 I’ll be getting basically just the covers, rings, and tabs. Based on the cost of the refill packs, Levenger considers the covers, rings, and tabs to be worth only $8.
- It’s slightly bigger than I need. As I said, I’ll be refilling it with my own paper, which will be 5½″ × 8½″—letter-sized sheets cut in half. This is a minor disadvantage at worst.
My homemade steno notebook
My homemade notebook is shown here next to a Rollabind side-bound notebook that I bought for about $6 at Staples (I think Rollabind was redesigning their product line at the time and was dumping this style).
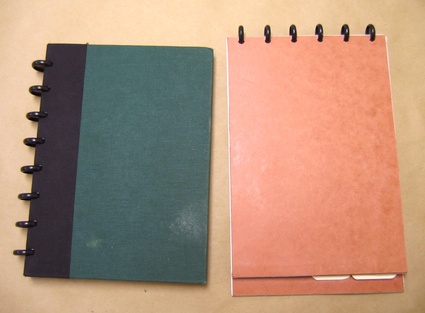
Like the Levenger steno, mine has six half-inch discs across the top, but because I’m using narrower paper, there’s less overhang at either end of the top edge. This makes for a slightly weaker binding, but so far I haven’t had any problems with pages detaching.
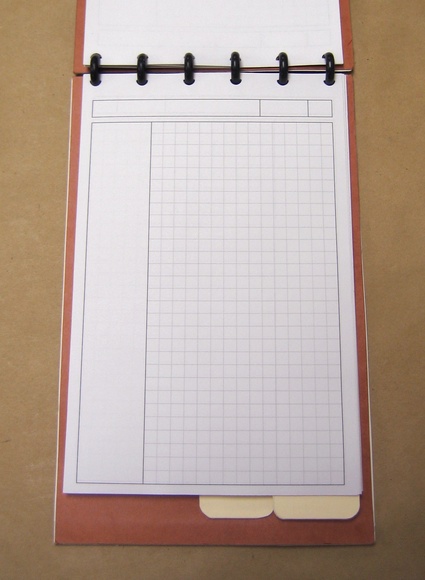
The pages are laid out in a modified Cornell style. I print them on 24 lb. paper in a two-up format, slice them apart with an old-fashioned guillotine paper trimmer, and punch the perforations with Levenger’s Circa Desk Punch.
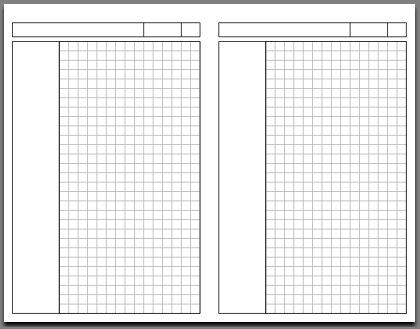
I use the three boxes in the header for the project name, the date, and the page number. The squares in the main writing area are spaced at ¼″ and guide both writing and drawing. I made this layout by programming it directly in PostScript and converting it to PDF. Both the PostScript and PDF versions are available in this zip archive.
The tabs are simply (and rather crudely) cut from manilla file folders.
The challenge in making my own Circa notebook was in the covers. I wanted a thick, stiff cover that I could write on while holding the cover in the air. The two problems with making such a cover are
- The Circa Desk Punch can’t accommodate thick material.
- Even if I could get thicker material punched, I wouldn’t be able to get it bound into the disks without bending and damaging it in the critical areas around the mushroom-shaped perforations.
The solution to both these problems was lamination. I built the covers by punching thinner cardboard stock, inserting the discs into the perforations, and then gluing the thinner pieces together in layers with the discs in place. The thinner pieces were flexible enough to survive the installation of the discs without damaging the areas near the perforations. Gluing the layers together gave the final product the stiffness I wanted.
The cardboard I used came from expanding file pockets commonly found in office supply stores—Redweld is probably the most popular brand name.
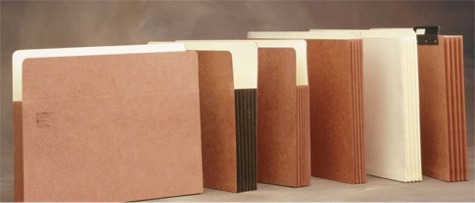
Each cover is made from two thicknesses of cardboard. The front and back are the same width, 6″, but different lengths. The front is 8¾″ long, and the back is 9½″ long. This was a mistake. The front and back pieces of the expanding pocket are of different heights, and the lengths of my pieces come from those heights. I intended to cut all the pieces to the same length, but had punched, installed, and laminated the longer one before I remembered to cut it shorter. I could have cut it later—albeit with some difficulty after it was laminated—but I find the bit of extra length on the back cover useful. It gives me a bit more surface to steady my hand on when writing near the bottom of a page. It’s not a great feature, by any means, but it isn’t a disadvantage.
The advantages of my steno notebook are:
- It’s cheap and easy to make. Even if I hadn’t had the discs and a spare expanding pocket lying around, it wouldn’t have cost much. Laying out and cutting the covers took the most time. Gluing the cover layers together and keeping them aligned, which I thought would be difficult, was surprisingly simple. Apart from the drying time, the whole project took less than half an hour.
- It’s customized. The paper is of the form I like to use when taking notes, and the covers and the tabs fit the paper.
- It’s stiff enough to write on even when it has only a few pieces of paper.
The disadvantages are:
- The cardboard covers probably won’t last as long as plastic covers would. They’re susceptible to water damage. The bottom corners, which I should have rounded, are starting to get a bit mushy from being bumped.
- It’s not the greatest look in the world. I like the reddish brown color, but the edge cuts are a bit rough. And the covers are a bit wavy because I didn’t have anything flat and heavy to weight them down with while the glue was curing.
Field testing
I’ve field tested my notebook on two occasions. The first was an outdoor project that lasted almost a week, 10-12 hours per day. I returned with over 30 pages of observations and test results. The second was a short indoor project of an hour or so with 3-4 pages of measurements and drawings. Here’s what I’ve learned:
- The binding is strong enough to keep the paper in place. The outdoor project was performed on some breezy days, and although the paper fluttered it never detached from the discs unless I wanted it to.
- The choice to write on only one side of the paper was correct. In the type of work I do, my hands often get a bit dirty. Writing on only one side of a sheet keeps the paper cleaner. Also, by “refiling” each page after it’s full (see below), only one sheet of paper is exposed to get dirty.
- Although I intended the tabs to separate different topics, possibly flipping back and forth between tabs as I worked on different matters, I found the best use of the tabs was as an archive location for completed sheets. I always wrote on the top sheet, with the front cover flipped around and under the back cover. When that top sheet was full of notes, I’d take it out of the notebook and reinsert it between the two tabs. This kept it and all the other archived pages out of the way and unlikely to get damaged or dirty, yet easy to find when I needed to refer to it.
- The tabs were still useful for topic separation. Before leaving my office, I printed maps and a couple of other pages of reference material, folded them in half, punched them, and inserted them between the last tab and the back cover. Although I usually couldn’t read them while they were folded, this kept them in a handy location, and they were easy to pull out when I needed to.
On the longer project, another engineer asked where he could get a notebook like mine. He was disappointed when I told him it was a one-off.
Conclusion
Although I probably wouldn’t have made my own notebook if Levenger’s had been available, my do-it-yourself steno fits my way of working better and was worth the time it took to make. It’s durability, however, is still questionable. If I can’t get more than a few months out of it before the covers need replacing, I’ll probably go ahead and buy Levenger’s.