
OmniOutliner to Markdown with TextMate
January 13, 2009 at 5:30 PM by Dr. Drang
In recent months, I’ve been outlining my reports at work instead of just plunging in at the top and trying to write them straight through. Not surprisingly, the writing goes more smoothly when I have the structure worked out ahead of time.
I’ve been using OmniOutliner Pro as my outliner, and I write my reports in Markdown format in TextMate before transforming them into LaTeX and then PDF for delivery to my clients1. To cut down on the amount of retyping, I wanted a way to export the outline from OmniOutliner Pro to a Markdown-formatted plain text file.
Fletcher Penney has a plugin for this, but I can’t use it because it doesn’t work the way I do. It assumes that every item in the outline will be a heading in the Markdown file—only Notes in the outline get turned into regular paragraphs. It’s almost as if Fletcher is expecting the user to write the whole report in OmniOutliner. My intention is to use the outliner for outlining only. Once I get the structure of my report set up, I’m done with the outliner and move to a text editor to flesh it out. So in my outlines, some items are headings, a few are full paragraphs (if the exact wording comes to me as I’m outlining), and most are sentence fragments that give the topic of the paragraph.
I thought about altering Fletcher’s plugin to do what I wanted, but I hate writing—or even editing—XSLT. After a bit of experimentation, I decided to create a TextMate command that would take one of the plain text export formats from OmniOutliner2 and turn it into Markdown. It was actually pretty easy, just a single macro.
(There’s also an Outlines bundle by Eric Hsu in the TextMate bundle repository, but its focus is almost the direct opposite of what I want. It turns plain text, tabbed outlines into other formats, like OPML and OmniOutliner. It has a Markdown filter, but it turns the outline into a nested list, not a structured document.)
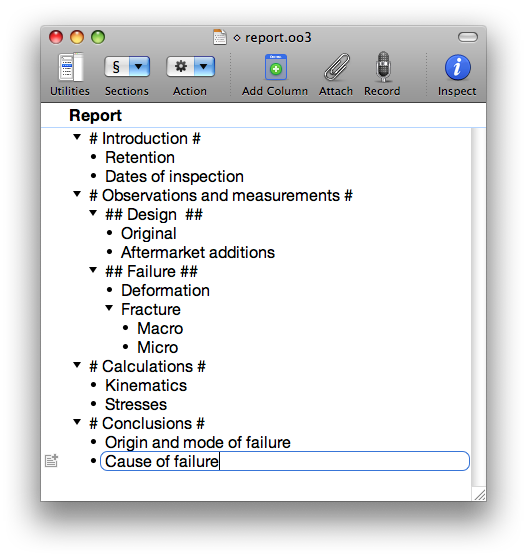
Here’s a generic sort of report outline in OmniOutliner. I use Markdown’s hash marks to distinguish between headings and regular paragraphs. It’s a little ugly, but I’m used to it and it makes the transformation a breeze.
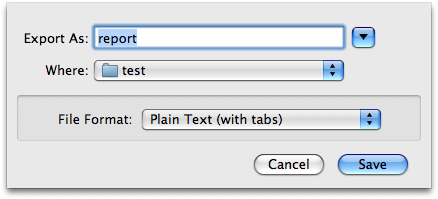
There’s usually a good deal more detail in my outlines before I export them, but this will do for an example. Export the outline using the Plain Text (with tabs) option.
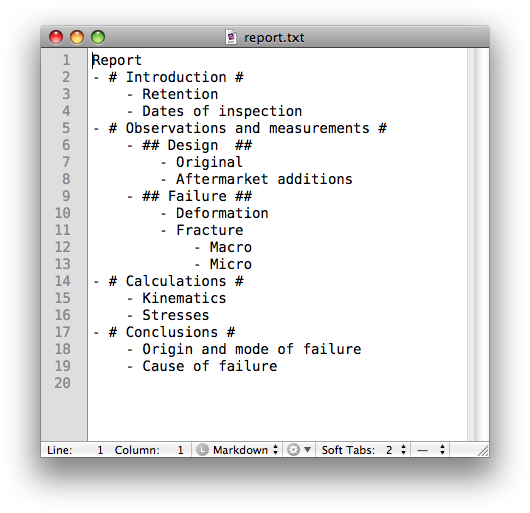
This creates a file named “report.txt” that looks like this when opened in TextMate.
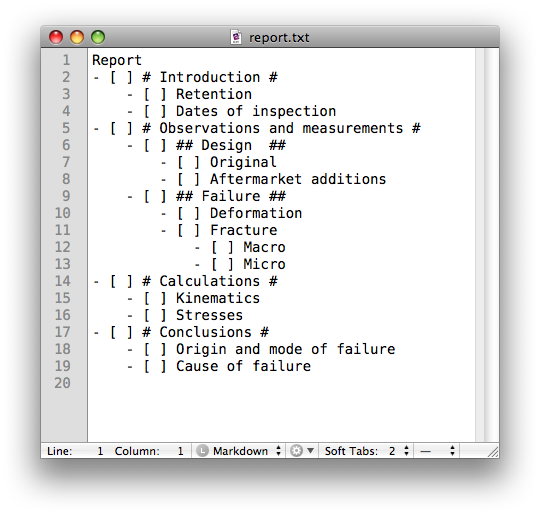
Or it could look like this if I forget to hide the checkboxes in OmniOutliner before exporting.
Now I invoke the OmniOutliner Text to Markdown macro, which I have bound to to ⌃⌥⌘-O (Control-Option-Command-O). The macro
- Gets rid of the top line, which is the OmniOutliner topic line.
- Strips the leading spaces and dashes (and checkboxes, if present).
- Adds blank lines between the items.
- Puts the insertion point at the top of the file.
Steps 2 and 3 are accomplished through a search-and-replace using this regular expression for search
^\s*\-(?:\s\[.\])?\s(.*)$
and this regular expression for replace.
$1\n
The (?:\s\[.\])? part of the search regex handles the checkbox, if present. It uses non-capturing parentheses so the $1 in the replace regex always refers to the text of the item.
Here’s what it looks like after the macro runs.
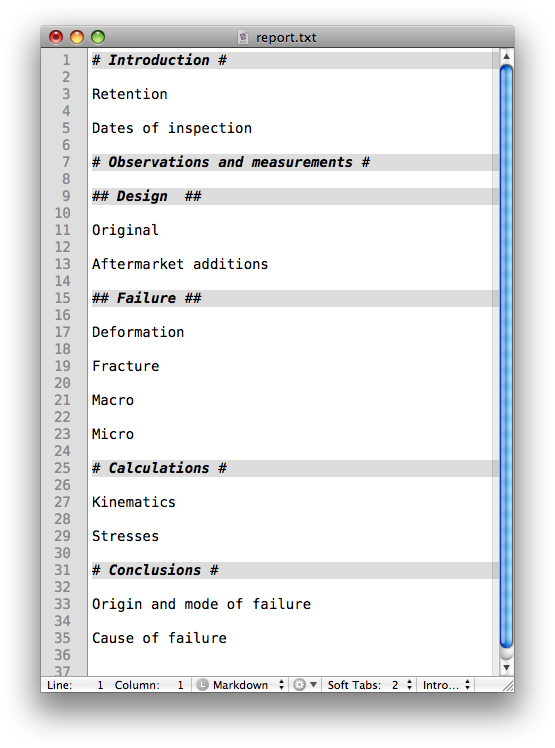
This is a skeleton report, ready to be filled in.
If you think this might be useful to you, the macro is in this zip file. Unzip it and drag it to the TextMate icon in your dock to install it. As I said, I have the macro bound to ⌃⌥⌘-O (Control-Option-Command-O), but you can change it to whatever you like in the TextMate Bundle Editor.
-
I know this sounds like a lot of work, but it really isn’t. The transformations are done by scripts that take virtually no effort to invoke. And I find writing in Markdown to be very fast because no effort is wasted in formatting the text. All the formatting is done by the scripts and LaTeX. ↩
-
Although I use OmniOutliner Pro, what I’m describing here will work just as well with the standard OmniOutliner. ↩