An unzipping shortcut
November 11, 2018 at 1:30 PM by Dr. Drang
I’ve been planning to write a post about the new Apple products for over a week, but I keep getting distracted. Today, I went to Apple’s PR pages for the MacBook Air, the Mac mini, and the iPad Pro to download images and went off on another tangent. As usual, I will inflict that tangent on you.
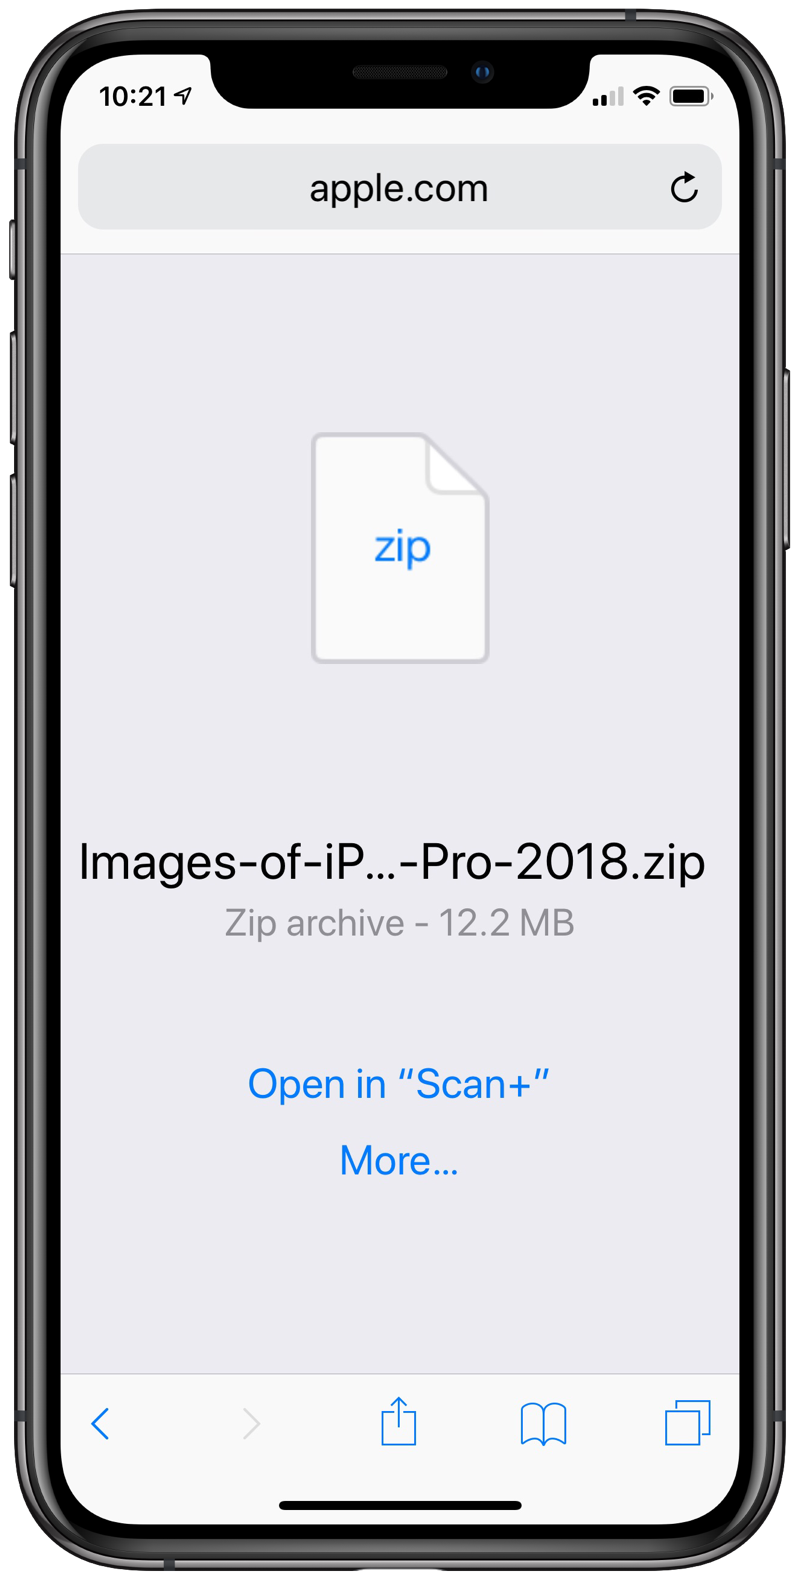
Apple provides the product images as zipped archives, so when I clicked on the link in the press release, I was confronted with this “what do I do?” screen in Safari.

The efficient thing would have been to walk ten feet over to my iMac and download the zip files there, where they can be expanded with almost no thought. But I took the procrastinator’s way out, deciding to solve the problem of dealing with zip files on iOS once and for all.
In the past, I’ve tried out a few zipping/unzipping apps, and they’ve all sucked, with user interfaces that are clumsy to navigate and look like something out of Windows 3.1. What I wanted was a clean, one-click solution similar to what we have on a Mac. A shortcut, if you will…
I went to the Shortcuts Gallery and searched on “zip,” “unzip,” and “archive.” There was a shortcut for zipping up a bunch of files and putting them into an email message, but nothing for unzipping and saving. I also couldn’t find anything by Googling. So I made my own.

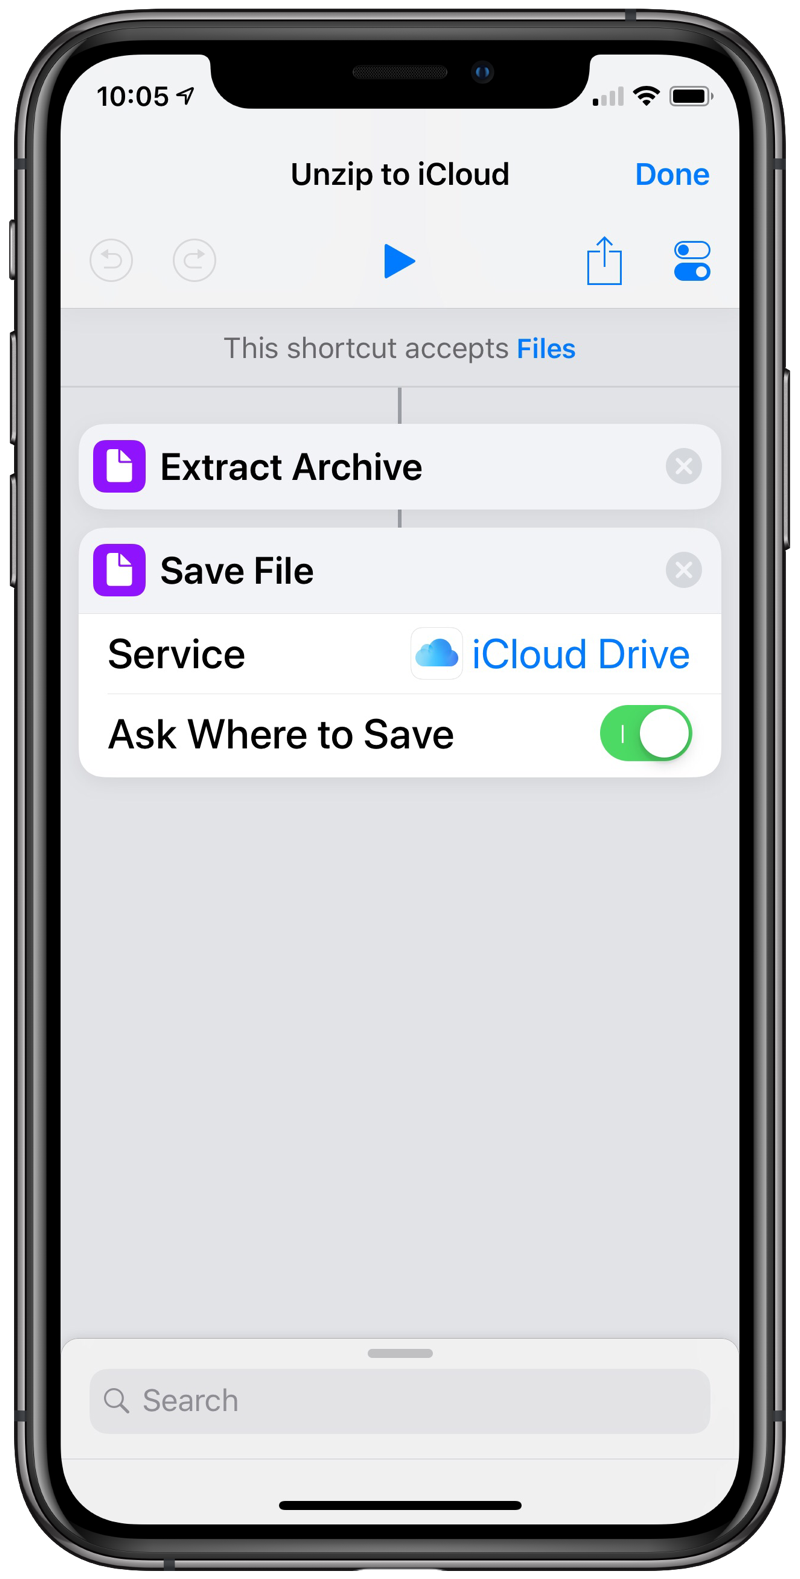
As you can see, there’s not much to it. You can make it yourself or download it.
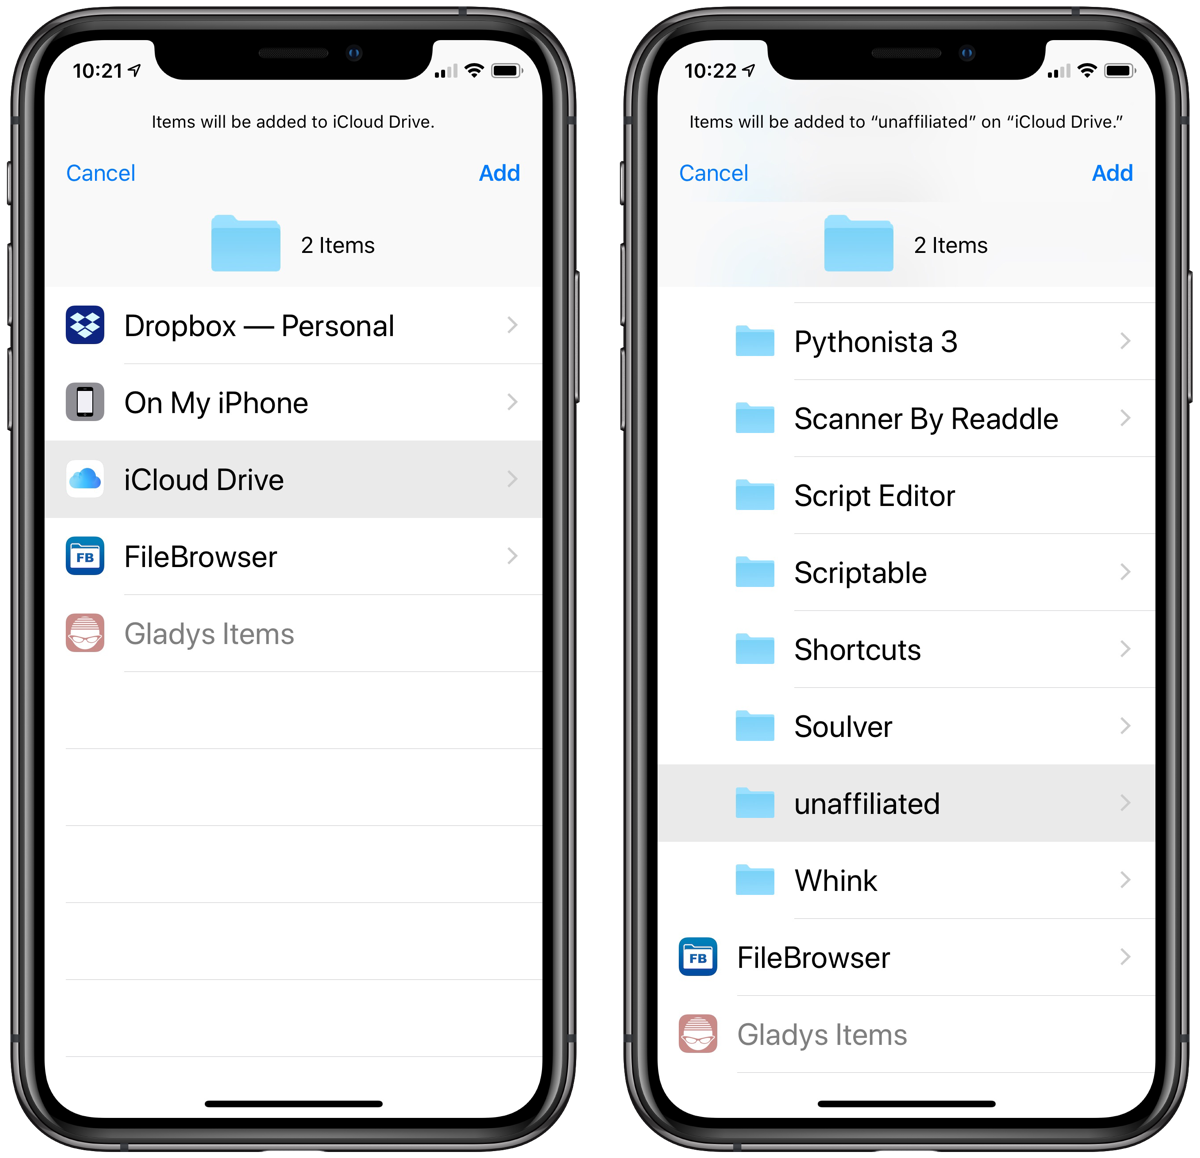
You run it as an Action Extension by bringing up the Share Sheet and selecting the Shortcuts Action. After you choose it from your list of Extension shortcuts, you’ll be presented with a Files-like location picker, from which you can choose where the expanded archive will be saved.

Even though “iCloud Drive” is the Service chosen in Step 2 of the shortcut, it can also save locally and into Dropbox. I suspect it can use services like Box and Google Drive, too, but I don’t use those services and haven’t tested them.
There are a few thing to keep in mind:
- The Files-like interface isn’t Files-like enough to give you the opportunity to create a new folder. You must save the expansion in an existing folder.
- It crashed the first time I tried to run it. I don’t know if that was because of low memory or some other odd reason, but it led me down a path of unnecessary debugging. When I couldn’t figure out what was wrong with it, I ran the shortcut again and it worked perfectly. 🤷🏼♂️
- The first couple of times I ran it, the Dropbox icon was dimmed and inaccessible. Then it became available. I’m sure I did something in between, but I can’t tell you what it was. 🤷🏼♂️🤷🏼♂️
- You can change the Service in Step 2 to Dropbox if you know you’ll never use iCloud Drive. I prefer to keep it as iCloud Drive, because that gives me the option to use either service.
- The Extract archive step can handle more that just zip files. According to the help info, it can also extract rar, tar.gz, tar.bz2, tar, gzip, cpio, cab, and iso archives. The only one missing from the list that I sometimes see is 7-zip.
I make no claim of originality with this. I’m sure plenty of people have written similar shortcuts, but I couldn’t find them. I didn’t even know there was an Extract Archive step in Shortcuts until today. I should spend more time on this page and this one.
Update Nov 12, 2018 6:53 PM
A few more things:
- As with the Mac’s Archive Utility and the default behavior of the
unzipcommand, the Extract Files action expands the archive exactly the way it was compressed. Whatever directory structure was zipped up will reappear within the folder you select in Step 2 of the shortcut. This could be a problem, as we’ll discuss below. As you might expect, Federico Viticci has already made a shortcut to do this, which you can download and install. Federico’s is more complicated than mine. He uses the name of the archive (without the
.zipextension) to create a new folder within the iCloud Drive Shortcuts folder and extracts the contents of the archive there.I’m of two minds on Federico’s shortcut. On the one hand, by creating a folder, it keeps things neat. With my shortcut, when you expand an archive that has lots of top-level files, those files can make a mess of the folder you save them in. On the other hand, Federico’s shortcut puts the expanded archive in a place I’ll never want it to go. It would be easy to edit Federico’s shortcut to put the extracted files somewhere other than the Shortcuts folder, but no matter what, it will go into a fixed location.
As best I can tell, there’s no way to get the best of both worlds: a neat folder of the extracted files and a choice of where that folder will be.
- Federico is putting together a massive list of shortcuts he’s built. The list is organized by category and includes both a download link for each shortcut and a brief description of what it does. The list is being continually updated, so it’ll be worth returning to after your first perusal.

