Geofencing in Flickr
January 6, 2013 at 9:57 PM by Dr. Drang
With so many people fleeing Instagram and returning to—or trying out—Flickr, I thought it worth describing one of Flickr’s less well-known privacy features: geofencing.
Geofencing is a way of controlling who gets to see the location information associated with your photos. Flickr, like iPhoto, allows you to set that information through a map interface, but I suspect most photos that have location data are those taken with an iPhone or other smartphone, where the latitude and longitude are added to the photo automatically by the phone’s GPS. Because I have this pseudonymous presence on the ’net, my reason for keeping certain location data hidden is obvious: I take a lot of photos at home and at work, and although I often want the photos themselves to be public, I don’t want those locations known. And even if you use your real name in your blog or on social media sites, that doesn’t mean you want everyone who sees you photos to know exactly where you live. Geofencing is the solution.
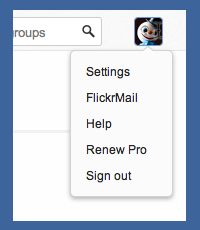
To set up a geofence in Flickr, make sure you’re logged in and hover your mouse over your avatar in the top right corner of the page (it doesn’t matter which page you’re on as long as you can see the avatar in that corner). A short menu will drop down.
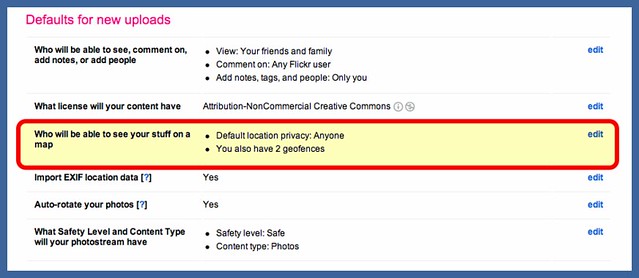
Choose Settings from that menu. When you get to the Settings page, click on the Privacy & Permissions tab. You’ll go to a page with lots of options. Scroll down to the section headed “Defaults for new uploads.” Here you’ll find the geofencing option, “Who will be able to see your stuff on a map.”
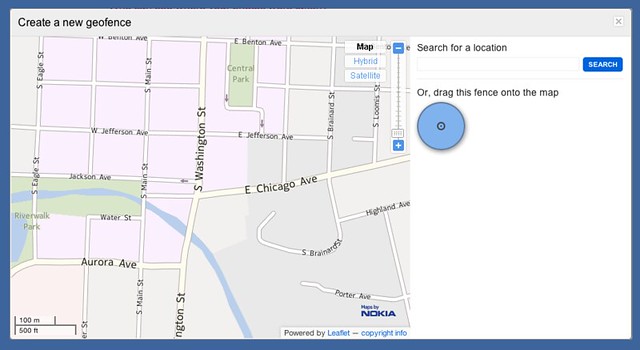
Click the “edit” link and a you’ll go to a Geo Preferences page. This will list all the geofences you’ve set up already (presumably none) and will allow you to create new ones. Click the Create New button and an inset window will appear with a map on the left and a search field and blue geofence circle on the right.
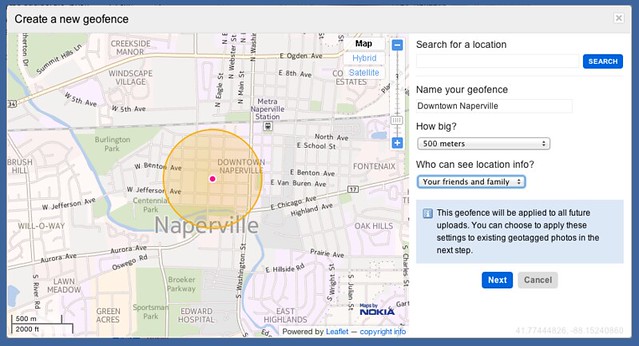
You navigate just as you would in Google Maps. If the starting location is so far from where you want your fence that zooming and scrolling would take a long time, you can use the search field to get there more quickly. When you’re where you want to be, drag the geofence circle out onto the map. The options on the right will change, and you’ll be able to set the name, the size, and the privacy options for this geofence.
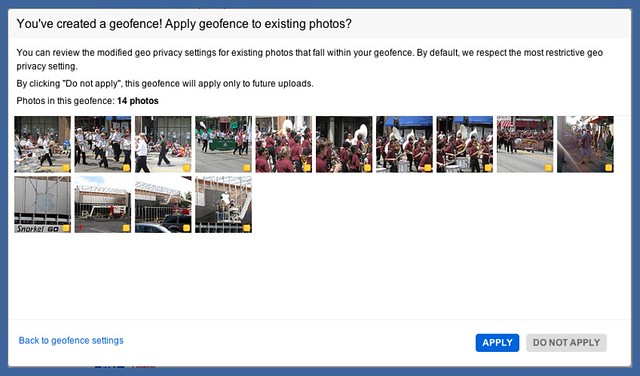
Clicking the Next button will take you to a screen that’ll give you the opportunity to apply this new geofence to photos you’ve already taken and uploaded that fall within its boundaries. This retroactive application of geofencing is a nice feature.
Flickr’s geofences are restricted to circles. If you want to fence off an area of a different shape, you’ll have to approximate it with a set of overlapping circles. Be aware, though, that you’re limited to a total of 10 geofences. I started off trying to make complicated shapes for my geofences but quickly decided it just wasn’t worth it. A little more restrictive here and a little less there wasn’t going to make any practical difference.
The Geo Preferences page includes this handy bit of advice:
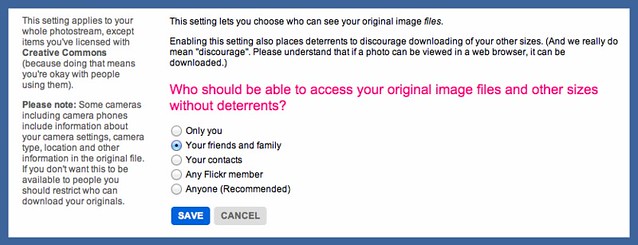
Please note: If you upload a photo with geo data, that info will be embedded in the EXIF data of the original file. If you don’t want people to have access to this information, you should restrict who can download your originals.
The second link will take you to a page that lets you set the download permissions to match the geofencing permissions.
When you’re done setting up your fences, you’ll probably want to test them. Log out of your account and visit some of your geofenced photos as an anonymous user. You should find that their locations are no longer visible. Now you can share certain photos without sharing more than you want.

