Photo locations with Apple Maps
February 8, 2014 at 9:28 PM by Dr. Drang
A couple of years ago I wrote a simple little script that looked through the EXIF data in a photo to see it included GPS coordinates. If it did, the script would open a map to the location at which the photo was taken. At first, the script worked with Google Maps only; I later extended it to work with Bing Maps. Earlier this week, I extended it again to work with Apple Maps and changed the library it used to access the EXIF data. In doing so, I learned a little about Apple’s Map URL scheme, a little more about the Python Imaging Library (PIL), and a quite a bit more about Pythonista and URL schemes on iOS.
Let’s start with the script itself. Its name is map, and here’s its source code:
python:
 1:  #!/usr/bin/python
 2:
 3:  import Image
 4:  import sys
 5:  import subprocess
 6:  import getopt
 7:
 8:  usage = """Usage: map [option] file
 9:
10:  Options:
11:    -g    use Google instead of Apple Maps
12:    -b    use Bing instead of Apple Maps
13:    -h    show this help message
14:
15:  Get the GPS data from the given image file and open a map
16:  to that location."""
17:
18:  # The map query URLs, with placeholders for longitude and latitude.
19:  query = { 'apple': 'http://maps.apple.com/?q=%.6f,%.6f',
20:            'google': 'http://maps.google.com/maps?q=loc:%.6f,%.6f',
21:            'bing': 'http://www.bing.com/maps/?v=2&where1=%.6f,%.6f' }
22:
23:  # Magic EXIF number.
24:  GPS = 34853
25:
26:  def degrees(dms):
27:    '''Return decimal degrees from degree, minute, second tuple.
28:
29:    Each item in the tuple is itself a two-item tuple of a
30:    numerator and a denominator.'''
31:
32:    deg, min, sec = dms
33:    deg = float(deg[0])/deg[1]
34:    min = float(min[0])/min[1]
35:    sec = float(sec[0])/sec[1]
36:    return deg + min/60 + sec/3600
37:
38:  def coord_pair(gps):
39:    'Return the latitude, longitude pair from GPS EXIF data.'
40:
41:    # Magic GPS EXIF numbers.
42:    LATREF = 1; LAT = 2
43:    LONGREF = 3; LONG = 4
44:
45:    lat = degrees(gps[LAT])
46:    if gps[LATREF] == 'S':
47:        lat = -lat
48:    long = degrees(gps[LONG])
49:    if gps[LONGREF] == 'W':
50:        long = -long
51:    return (lat, long)
52:
53:  # Parse the options.
54:  try:
55:    options, args = getopt.getopt(sys.argv[1:], 'gbh')
56:  except getopt.GetoptError, err:
57:    print str(err)
58:    sys.exit(2)
59:
60:  # Set the option values.
61:  engine = 'apple'           # default
62:  for o, a in options:
63:    if o == '-g':
64:      engine = 'google'
65:    elif o == '-b':
66:      engine = 'bing'
67:    else:
68:      print usage
69:      sys.exit()
70:
71:  try:
72:    # Open the photo file and read the EXIF data.
73:    exif = Image.open(args[0])._getexif()
74:  except AttributeError:
75:    print "No EXIF data for %s" % args[0]
76:    sys.exit()
77:  except IOError:
78:    print "Couldn't open %s" % args[0]
79:    sys.exit()
80:
81:  try:
82:    # Read the GPS info.
83:    gps = exif[GPS]
84:    latitude, longitude = coord_pair(gps)
85:  except KeyError:
86:    print "No GPS data for %s" % args[0]
87:    sys.exit(1)
88:
89:  # Open the map.
90:  subprocess.call(['open', query[engine] % (latitude, longitude)])
The usage message at the top explains how to call it from the command line. I have it set now to use Apple Maps by default, which, under Mavericks, can be launched by opening URLs that start with http://maps.apple.com. I usually prefer Apple Maps to Google or Bing because Apple Maps understands that two-finger swipes on the track pad are for scrolling, not for zooming.1
By looking at Lines 19 and 90, you’ll see that I launch Apple Maps with a command like
open http://maps.apple.com/?q=41.772982,-88.150365
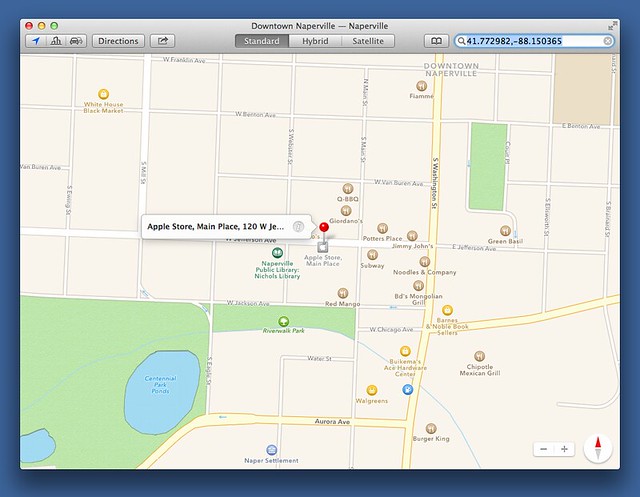
where the numbers at the end are the latitude and longitude of the location extracted from the EXIF data of the photo. It opens Maps with a nice zoomed-in view and a red marker dropped at the location.
Note also that the coordinates are in the search field.
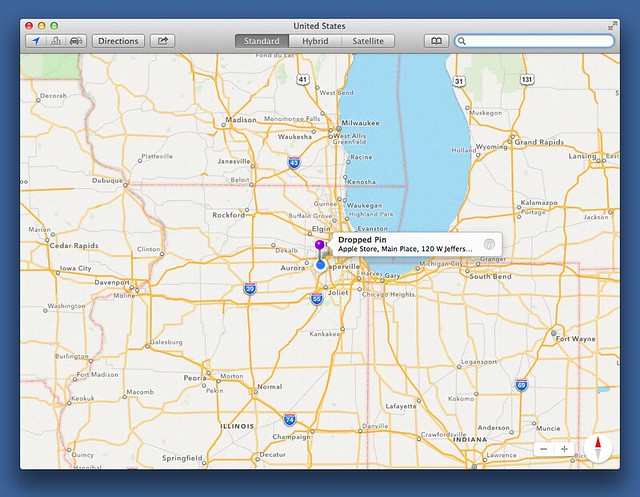
If you read the aforelinked Apple Maps URL scheme reference, you may be wondering why I used the q parameter instead of the ll parameter. The ll parameter is, after all, specifically designed to accept a latitude and longitude pair; the q parameter is more for mapping addresses. Well, here’s what I get if I use
open http://maps.apple.com/?ll=41.772982,-88.150365
This is zoomed out way too far to be useful. In theory, I could add a z or sspn parameter to start with a closer view, but every time I’ve tried that, the map is centered on the right location but the marker doesn’t appear. So until Maps works the way the documentation says it should, I’m sticking with q.
My map script used to use the pyexiv2 library, but that library has been deprecated in favor of gexiv2, which is supposed to work with Python 3 as well as Python 2. I wouldn’t mind giving gexiv2 a try, but it’s installation instructions are more Linux-centric than I’d like and there’s also this discouraging note:
Formal API documentation is not available at this time. However, a seasoned developer can work out how to use gexiv2 by looking at its primary header file (C), VAPI (Vala), or GExiv2.py (Python).
A seasoned developer also recognizes when other developers have decided that they’re not going to bother documenting their work.
EXIF libraries for Python are in a sorry state. Contrary to the Zen of Python, there isn’t one obvious way to read and/or write EXIF metadata. This is in stark contrast to Perl, where Phil Harvey’s ExifTool, which is both a library and a command-line utility, is the clear weapon of choice.
I could, of course, just use Python’s subprocess module to call out to the exiftool command, but I decided to go a different route. I knew that PIL’s Image library had method that would read EXIF data, and I knew that Pythonista includes PIL.2 I figured that if I wrote map to get the GPS location values via PIL, I could adjust it to run under Pythonista on my phone. It would be fun (and possibly even useful) to be able to select a photo from my phone’s Camera Roll and show its location in the Maps app.
So that’s what I did. As you can see, I imported the Image module and used the _getexif method on Line 73 to read the EXIF data into a dictionary. Line 83 then pulls out the GPS section of the metadata and sends it off to the coord_pair function, which extracts the latitude and longitude.
(The latitude and longitude are stored in a weird format. Each are represented by three pairs of integers. The degrees value is the quotient of the first pair, the minutes value is the quotient of the second pair, and the seconds value is the quotient of the third pair. Oh yes, these are always positive; there’s another field that uses a letter to tell us whether the lattitude is north or south and yet another that tells us whether the longitude is east or west. My coord_pair (Lines 38–51) and degrees (Lines 26–36) functions handle the details of this mess.)
The leading underscore marks _getexif as an internal function, one that’s really meant to be used by other functions in the module. This is why you don’t see a description of it in the PIL documentation. But Python isn’t strict about private functions, so the leading underscore is more what you call guidelines than actual rules.
The map script worked fine on my Macs, which are both running Mavericks. But when I tried adapting it to run on my phone, I learned that Pythonista’s PIL isn’t the same as the standard PIL. This simple little script
python:
1:  import Image
2:  import photos, console
3:
4:  ph = photos.pick_image()
5:  console.clear()
6:  exif = ph._getexif()
7:  print exif
failed with an AttributeError on Line 6 because even though pick_image returns an Image, Pythonista doesn’t include the _getexif method. Bummer.
When I mentioned this on Twitter,
Fun script idea: choose a photo on your phone and see where it it was taken in Maps. But Pythonista’s PIL doesn’t work like desktop PIL.
— Dr. Drang (@drdrang) Feb 5 2014 10:42 PM
Ole Zorn acknowledged the difference between standard PIL and Pythonista PIL and suggested using the get_metadata function. He even linked to a Gist with this short demonstration script:
python:
 1:  # Shows the location of the last photo in the canera roll in the Maps app.
 2:  # (thanks to @HyShai for pointing out that the latitude/longitude refs are necessary)
 3:
 4:  import photos
 5:  import webbrowser
 6:
 7:  meta = photos.get_metadata(-1)
 8:  gps = meta.get('{GPS}')
 9:  if gps:
10:    latitude = str(gps.get('Latitude', 0.0)) + gps.get('LatitudeRef', '')
11:    longitude =str(gps.get('Longitude', 0.0)) + gps.get('LongitudeRef', '')
12:    maps_url = 'safari-http://maps.apple.com/?ll=%f,%f' % (latitude, longitude)
13:    webbrowser.open(maps_url)
14:  else:
15:    print 'Last photo has no location metadata.'
The script works fine,3 but isn’t very useful because you have to know the index of the photo ahead of time and build it into the script as the argument to get_metadata on Line 7.
Update 2/9/14
Ole informs me (look at his replies to my tweet) that the problem with _getexif has less to do with Pythonista’s PIL implementation than with its photos module. The photos.pick_image function collects the pixel data from the chosen image but leaves the metadata behind. The upshot is that _getexif is available for JPEGs that you read into your program through other means (like downloading from a server), but not for images gathered from your Camera Roll via photos.pick_image. Still a bummer.
Despite being unable to use Ole’s script, it did explain something that had been bugging me about the Maps URL scheme. If you take a URL like
http://maps.apple.com/?q=41.772982,-88.150365
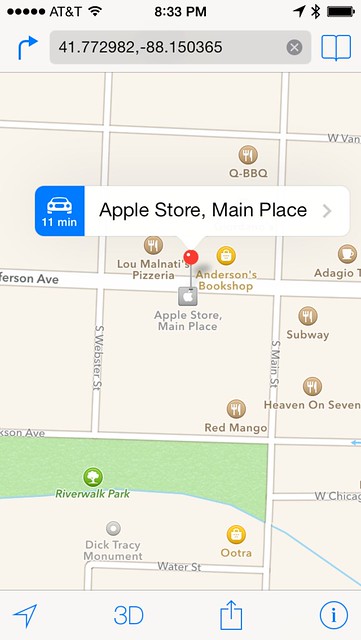
and paste it into Safari’s URL field, it’ll launch Maps and focus on the given location.
But if you write a short Pythonista script that uses the webbrowser module to try to open Maps,
python:
1:  import webbrowser
2:
3:  webbrowser.open("http://maps.apple.com/?q=41.772982,-88.150365")
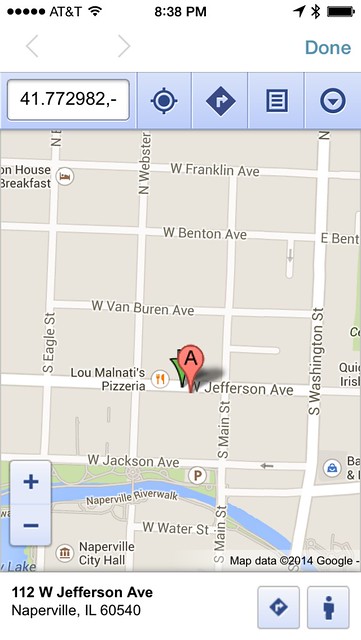
it opens to a Google Maps web page within Pythonista.
I’m not sure why this happens; maybe it has something to do with Google being the original iOS map provider. Whatever the reason, the solution was in Line 12 of Ole’s script: to open Maps, use safari-http instead of just http. This script
python:
1:  import webbrowser
2:
3:  webbrowser.open("safari-http://maps.apple.com/?q=41.772982,-88.150365")
acts just like pasting the address into Safari’s URL field: Maps launches, drops a pin at the location, and zooms in to the pin.
Update 2/9/14
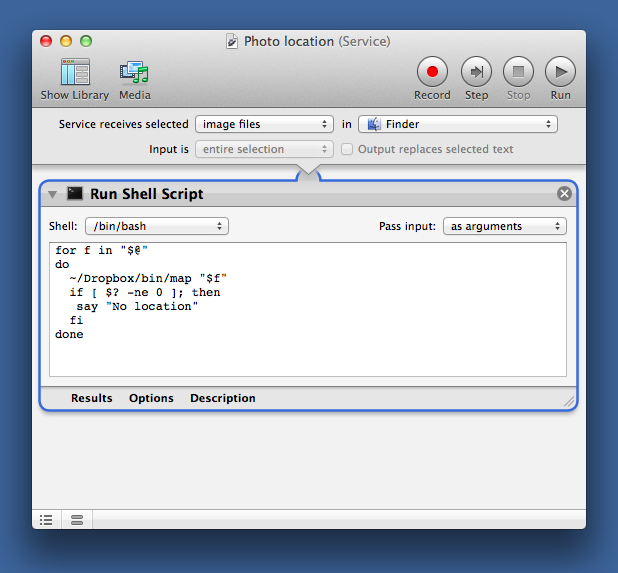
I probably should have mentioned that I usually use the map script through a Service, not from the command line. The service is described in one of the earlier posts, but since no one follows links, I’ll reproduce it here.
The script in the Run Script action is
bash:
1:  for f in "$@"
2:  do
3:    ~/Dropbox/bin/map "$f"
4:    if [ $? -ne 0 ]; then
5:     say "No location"
6:    fi
7:  done
I right-click on an image, choose from the popup menu, and Maps launches to show me where it was taken.
This post, like my attempts to write these scripts, has gone all over the—no, I can’t bring myself to write that. Here’s what I’ve learned or relearned:
- Python could use a good EXIF library that’s easy to install and doesn’t get abandoned. Given the importance of EXIF data in JPEG files, I’m surprised this hasn’t been a bigger priority.
- PIL has a simple way of reading EXIF data that isn’t well publicized.
- The Maps URL scheme in Mavericks doesn’t follow Apple’s documentation.
Pythonista’s PIL isn’t standard PIL.Photos read through Pythonista’sphotos.pick_imagefunction don’t include the EXIF metadata.- The Maps URL scheme in iOS needs a slight tweak to get it to work with Pythonista’s
webbrowsermodule.
-
It does not, however, have the same understanding of the scroll ball on the Apple Mouse, which is infuriating. I assume Apple did this to be consistent with other mapping programs, like Google and Bing, that use the scroll wheel to zoom. This is an unusual case of Apple copying wrong behavior—Apple is usually brave enough to sacrifice “standards” in order to do what’s right. ↩
-
You might argue that PIL is just as much a dead end as
pyexiv2, because it doesn’t work under Python 3. But the PIL workalike, Pillow, does work under Python 3, so PIL code should be easy to transition. ↩ -
Actually, it doesn’t work fine. Calls to
get_metadataon my phone always crash Pythonista if the image being queried is a photo (as opposed to a screenshot, for example). That’s a known bug that Ole has targeted for fixing in an upcoming release. ↩

