Weather Underground without Pythonista
March 3, 2014 at 10:50 PM by Dr. Drang
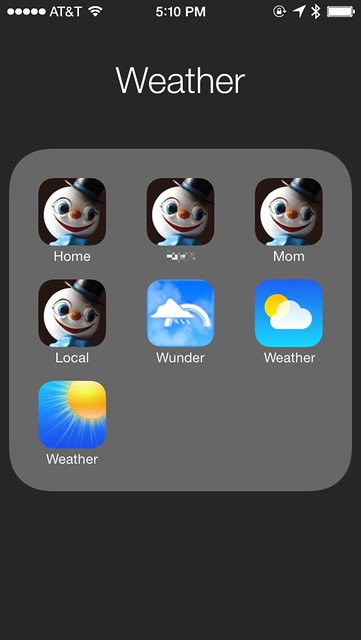
The little phone-hosted weather web app I wrote about a week ago was fun to build and easy to extend, but it wasn’t as convenient to use as my old CGI script. So I decided to drop the dependence on Pythonista, turn it into a CGI script hosted on a server, generalize it to handle any location, and create another file that used JavaScript to get my current location. This has worked out pretty well. By using Mobile Safari’s Add to Home Screen feature, I now have a Weather folder on my home screen with one-click access to weather pages for wherever I happen to be as well as for the three towns where my daughter, my mom, and I live.1
I suppose I should change those icons to be a little more descriptive.
The first part of the system is the CGI script, which is a slight variation and extension on the Pythonista script I wrote last week. It still needs, in Line 157, a free API key from the Weather Underground to access the data.
python:
1: #!/usr/bin/python
2:
3: import json
4: import urllib
5: import time
6: from datetime import datetime
7: import cgi
8:
9: ############################### Functions #################################
10:
11: def wunder(lat, lon, wukey):
12: "Return a dictionary of weather data for the given location."
13:
14: # URLs
15: baseURL = 'http://api.wunderground.com/api/%s/' % wukey
16: dataURL = baseURL + 'conditions/astronomy/hourly/forecast/q/%f,%f.json' % (lat, lon)
17: radarURL = baseURL + 'radar/image.png' \
18: + '?centerlat=%f¢erlon=%f' % (lat, lon - 1) \
19: + '&radius=100&width=480&height=360&timelabel=1' \
20: + '&timelabel.x=10&timelabel.y=350' \
21: + '&newmaps=1&noclutter=1'
22:
23: # Collect data.
24: ca = urllib.urlopen(dataURL).read()
25: j = json.loads(ca)
26: current = j['current_observation']
27: astro = j['moon_phase']
28: hourly = j['hourly_forecast'][0:13:3]
29: daily = j['forecast']['simpleforecast']['forecastday']
30:
31: # Turn sun rise and set times into datetimes.
32: rise = '%s:%s' % (astro['sunrise']['hour'], astro['sunrise']['minute'])
33: set = '%s:%s' % (astro['sunset']['hour'], astro['sunset']['minute'])
34: sunrise = datetime.strptime(rise, '%H:%M')
35: sunset = datetime.strptime(set, '%H:%M')
36:
37: # Mapping of pressure trend symbols to words.
38: pstr = {'+': 'rising', '-': 'falling', '0': 'steady'}
39:
40: # Forecast for the next 12 hours.
41: today = []
42: for h in hourly:
43: f = [h['FCTTIME']['civil'],
44: h['condition'],
45: h['temp']['english'] + '°']
46: today.append(f)
47:
48: # Forecasts for the next 2 days.
49: d1 = daily[1]
50: tomorrow = { 'day': d1['date']['weekday'],
51: 'desc': d1['conditions'],
52: 'trange': '%s° to %s°' %
53: (d1['low']['fahrenheit'], d1['high']['fahrenheit'])}
54: d2 = daily[2]
55: dayafter = { 'day': d2['date']['weekday'],
56: 'desc': d2['conditions'],
57: 'trange': '%s° to %s°' %
58: (d2['low']['fahrenheit'], d2['high']['fahrenheit'])}
59:
60: # Construct the dictionary and return it.
61: wudata = {'pressure': float(current['pressure_in']),
62: 'ptrend': pstr[current['pressure_trend']],
63: 'temp': current['temp_f'],
64: 'desc': current['weather'],
65: 'wind_dir': current['wind_dir'],
66: 'wind': current['wind_mph'],
67: 'gust': float(current['wind_gust_mph']),
68: 'feel': float(current['feelslike_f']),
69: 'sunrise': sunrise,
70: 'sunset': sunset,
71: 'radar': radarURL,
72: 'today': today,
73: 'tomorrow': tomorrow,
74: 'dayafter': dayafter}
75: return wudata
76:
77:
78: def wuHTML(lat, lon, wukey):
79: "Return HTML with WU data for given location."
80:
81: d = wunder(lat, lon, wukey)
82:
83: # Get data ready for presentation
84: sunrise = d['sunrise'].strftime('%-I:%M %p').lower()
85: sunset = d['sunset'].strftime('%-I:%M %p').lower()
86: temp = '%.0f°' % d['temp']
87: pressure = 'Pressure: %.2f and %s' % (d['pressure'], d['ptrend'])
88: wind = 'Wind: %s at %.0f mph, gusting to %.0f mph' %\
89: (d['wind_dir'], d['wind'], d['gust'])
90: feel = 'Feels like: %.0f°' % d['feel']
91: sun = 'Sunlight: %s to %s' % (sunrise, sunset)
92: htmplt = '<tr><td class="right">%s</td><td>%s</td>' +\
93: '<td class="right">%s</td></tr>'
94: hours = [ htmplt % tuple(f) for f in d['today'] ]
95: today = '\n'.join(hours)
96: forecast1 = '<tr><td>%s</td><td>%s</td></tr>' %\
97: (d['tomorrow']['desc'], d['tomorrow']['trange'])
98: forecast2 = '<tr><td>%s</td><td>%s</td></tr>' %\
99: (d['dayafter']['desc'], d['dayafter']['trange'])
100:
101:
102: # Assemble the HTML.
103: html = '''<!DOCTYPE html PUBLIC "-//W3C//DTD XHTML 1.0 Strict//EN"
104: "http://www.w3.org/TR/xhtml1/DTD/xhtml1-strict.dtd">
105: <html>
106: <head>
107: <meta name="viewport" content = "width = device-width" />
108: <title>Weather</title>
109: <style type="text/css">
110: body { font-family: Helvetica; }
111: p { margin-bottom: 0; }
112: h1 { font-size: 175%%;
113: text-align: center;
114: margin-bottom: 0; }
115: h2 { font-size: 125%%;
116: margin-top: .5em ;
117: margin-bottom: .25em; }
118: td { padding-right: 1em;}
119: td.right { text-align: right; }
120: #now { margin-left: 0; }
121: #gust { padding-left: 2.75em; }
122: div p { margin-top: .25em;
123: margin-left: .25em; }
124: </style>
125: </head>
126: <body onload="setTimeout(function() { window.top.scrollTo(0, 1) }, 100);">
127: <h1>%s • %s </h1>
128:
129: <p><img width="100%%" src="%s" /></p>
130:
131: <p id="now">%s<br />
132: %s<br />
133: %s<br />
134: %s<br /></p>
135: <h2>Today</h2>
136: <table>
137: %s
138: </table>
139: <h2>%s</h2>
140: <table>
141: %s
142: </table>
143: <h2>%s</h2>
144: <table>
145: %s
146: </table>
147:
148: </body>
149: </html>''' % (temp, d['desc'], d['radar'], wind, feel, pressure, sun, today, d['tomorrow']['day'], forecast1, d['dayafter']['day'], forecast2)
150:
151: return html
152:
153:
154: ############################## Main program ###############################
155:
156: # My Weather Underground key.
157: wukey = 'xxxxxxxxxxxxxxxx'
158:
159: # Get the latitude and longitude.
160: form = cgi.FieldStorage()
161: lat = float(form.getvalue('lat'))
162: lon = float(form.getvalue('lon'))
163:
164: # Generate the HTML.
165: html = wuHTML(lat, lon, wukey)
166:
167: print '''Content-Type: text/html
168:
169: %s''' % html
The two functional differences between this script and its ancestor are:
This script gets the latitude and longitude from the URL as
latandlonparameters, like this:http://server.com/path/wunder.py?lat=41.88267&lon=-87.62331The earlier script got the coordinates through Pythonista’s
locationmodule.- This script, because it’s called from a running web server, simply prints the header and page HTML. The earlier script had to start up a web server on the phone using the
BaseHTTPServermodule and then connect to it with thewebbrowsermodule.
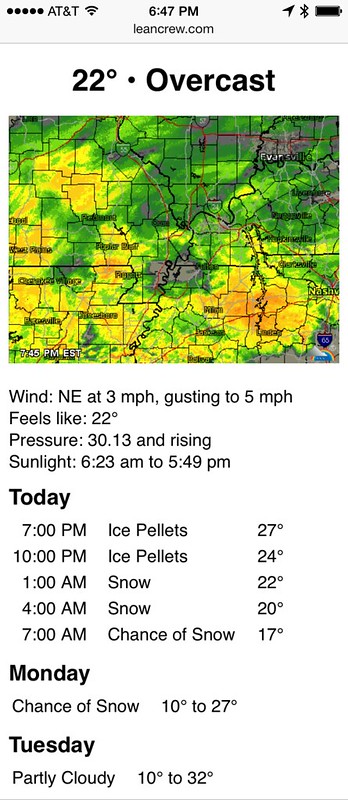
The other differences have to do with the data gathered from the Weather Underground API. As you can see by comparing the URL constructed in Line 16 to the API documentation, we’re now collecting the current conditions (conditions), an hourly forecast for the next 36 hours (hourly), daily forecasts for the next three days (forecast), and the sunrise and sunset times (astro). The script then builds a page with the information I like to have handy. Here’s an example:
After the radar map and the current conditions, both of which were described in the previous post, forecasts are given for the next twelve hours at three-hour intervals and then overall summaries for the next two days.
The Home, Mom, and Daughter buttons in my Weather folder were built using these steps:
- Determine the latitude and longitude. I find the easiest way to do this is to get to the spot in Google Maps, right click on it and choose Drop LatLng Marker from the context menu.2 That puts a little marker on the spot with the latitude and longitude.
- Use the coordinates to build a URL like the one shown above.
- Go to that URL in Mobile Safari. I copy the URL built in Step 2 and transfer it from my Mac to my iPhone with Command-C
- Select Add to Home Screen from the Sharing popup to create the button.
Update 3/4/14
Nathan Gouwens told me on Twitter that choosing What’s Here? from the right-click popup menu in Google Maps will also give you the latitude and longitude of the spot you clicked on. In my tests, they show up in both the title of the page (which isn’t selectable) and in the search field (which is). I don’t think I’ve ever used What’s Here?, so thanks to Nathan for pointing it out.
That’s good for fixed locations. What about getting the weather for wherever you happen to be? For that, I wrote this HTML document, which uses JavaScript to get the phone’s location using the Geolocation class:
xml:
 1:  <!DOCTYPE html PUBLIC "-//W3C//DTD XHTML 1.1//EN"
 2:    "http://www.w3.org/TR/xhtml11/DTD/xhtml11.dtd">
 3:  <html>
 4:  <head>
 5:  <meta name="viewport" content = "width = device-width" />
 6:  <title>Weather</title>
 7:  <script>
 8:    function getWeather(location) {
 9:      var lat = location.coords.latitude;
10:      var lon = location.coords.longitude;
11:      wURL = "http://server.com/path/wunder.py?lat=" + lat + "&lon=" + lon;
12:      document.location.href = wURL;
13:    }
14:  </script>
15:  </head>
16:  <body onload="setTimeout(function() { window.top.scrollTo(0, 1) }, 100);">
17:    <script>
18:      navigator.geolocation.getCurrentPosition(getWeather);
19:    </script>
20:
21:   <!-- <h1>Hello</h1> -->
22:  </body>
23:  </html>
It calls the getCurrentPosition method, whose argument is the name of the function that gets called when the position is determined.3 That function, getWeather, redirects to the CGI script with the current latitude and longitude. Save this file on your server where you can access it with an address like
http://server.com/path/local.html
Getting a home screen button for this page requires a little trickery. You can’t just navigate to this page as-is and use Add to Home Screen. If you try it that way, you’ll end up with a hard-coded link to the weather page for the location you’re at when you make the button—the redirection will take you away from local.html before you can finish making the button. The trick is to first comment out the script on Lines 17–19 and uncomment the h1 on Line 21. This will create a simple static page that you can Add to Home Screen. After making the home screen button, go back in and put the commenting and uncommenting back to the way it’s shown above. Your home screen button will then go to the HTML page, which will redirect it to the CGI script.
The speed at which these pages load varies with Weather Underground’s response time, but is typically about as fast as native weather apps. If you’re a creature of habit, and check the weather at about the same time every day, a native app can anticipate that and have the data ready for you. This system certainly can’t compete with that.
I’ve noticed that sometimes the radar map comes back as a big empty square. I’m guessing there’s some sort of time limit associated with it, and if it can’t return an image within that time, it just fails. A refresh of the page usually fixes the problem, but unless there’s precipitation in the hourly forecast, I generally don’t bother.
The phone-hosted Pythonista script from last week was never going to be as convenient to use as this server-based alternative, because it would’ve required programming to add fixed locations. That can’t compete with just typing the coordinates into a URL. This is a duller solution, but ultimately more useful.
-
Yes, I’ve seen this article, and it works in both generational directions. ↩
-
I believe Drop LatLng Marker was a feature from Google Labs that I turned on long ago and still have. I don’t know if everyone has it now. If not, you can get coordinates from addresses using a geocoder page. ↩
-
I’d like to point out that one of the things I hate about JavaScript is its constant use of callback functions, which often end up nesting several layers deep. I understand (I think) why it’s done, but that doesn’t mean I have to like it. ↩


