Screen captures to clipboard again
January 25, 2015 at 12:26 AM by Dr. Drang
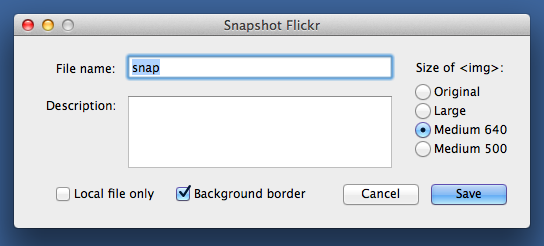
Back in 2011, in an attempt to reduce site traffic when this blog was on a different host and was being run on WordPress, I began using my Flickr account to host the screen captures that accompany many of my posts. I wrote a little utility, called snapflickr to make the process of capturing and uploading easier. Last year, I added the ability to save the screen captures to the clipboard. I did this so I could open the screen images quickly in Acorn for editing, but later found myself using it to get online receipts (captured from, for example, Amazon’s invoice pages) to add to my expense reports in Numbers. This worked, but was a little clumsy—negotiating the additional options in the utility slowed down the process of getting a screenshot.

Now that I have a static site and have switched hosts, it seemed like a good time to
- Stop using Flickr as a poor man’s CDN and go back to hosting images on the blog’s server.
- Split the utility in two: one that sends screenshots to the clipboard, and another that uploads them to the server.
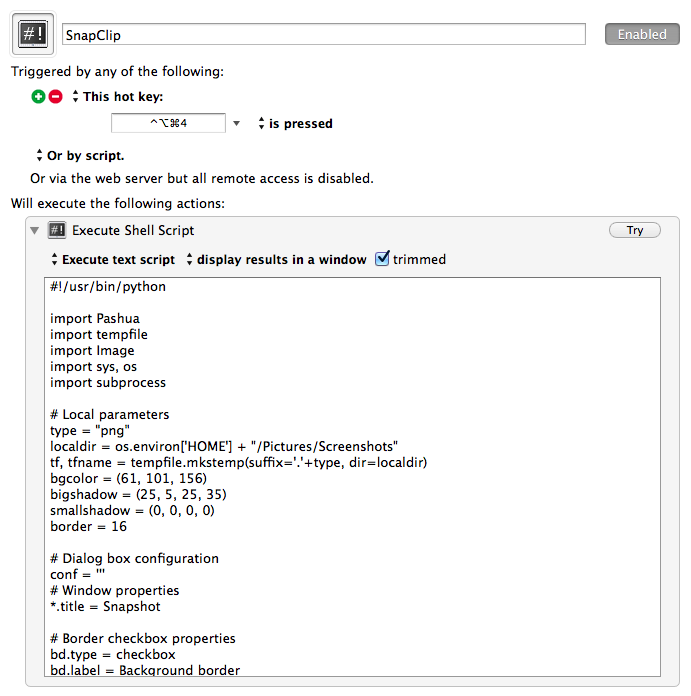
I’m still tweaking the one that uploads to the server, but the screen capturing clipboard utility is ready for its closeup. It’s a Keyboard Maestro macro called SnapClip that looks like this in the KM Editor:

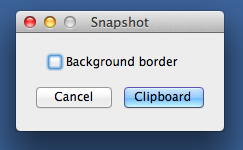
When I press the ⌃⌥⌘4 keyboard combination, the cursor goes into screen capture mode, much as it would if I pressed the system standard ⇧⌘4 or ⌃⇧⌘4 combos. But after I’ve chosen the window or screen rectangle I want to capture, SnapClip displays this window:

The checkbox allows me to put a dark blue border around the captured image, which is the style I’ve adopted for full-window captures. I think it makes the captured image look more like a window on the Desktop than if the window is captured “bare.”
Of course, providing the option for the border means I can’t just use what’s built into the ⌃⇧⌘4 command. The Python script that SnapClip runs is this:
python:
 1:  #!/usr/bin/python
 2:
 3:  import Pashua
 4:  import tempfile
 5:  import Image
 6:  import sys, os
 7:  import subprocess
 8:
 9:  # Local parameters
10:  type = "png"
11:  localdir = os.environ['HOME'] + "/Pictures/Screenshots"
12:  tf, tfname = tempfile.mkstemp(suffix='.'+type, dir=localdir)
13:  bgcolor = (61, 101, 156)
14:  border = 16
15:
16:  # Dialog box configuration
17:  conf = '''
18:  # Window properties
19:  *.title = Snapshot
20:
21:  # Border checkbox properties
22:  bd.type = checkbox
23:  bd.label = Background border
24:  bd.x = 10
25:  bd.y = 40
26:
27:  # Default button
28:  db.type = defaultbutton
29:  db.label = Clipboard
30:
31:  # Cancel button
32:  cb.type = cancelbutton
33:  '''
34:
35:  # Capture a portion of the screen and save it to a temporary file.
36:  subprocess.call(["screencapture", "-ioW", "-t", type, tfname])
37:
38:  # Exit if the user canceled the screencapture.
39:  if not os.access(tfname, os.F_OK):
40:    os.remove(tfname)
41:    sys.exit()
42:
43:  # Open the dialog box and get the input.
44:  dialog = Pashua.run(conf)
45:  if dialog['cb'] == '1':
46:    os.remove(tfname)
47:    sys.exit()
48:
49:  # Add a desktop background border if asked for.
50:  snap = Image.open(tfname)
51:  if dialog['bd'] == '1':
52:    # Make a solid-colored background bigger than the screenshot.
53:    snapsize = tuple([ x + 2*border for x in snap.size ])
54:    bg = Image.new('RGB', snapsize, bgcolor)
55:    bg.paste(snap, (border, border))
56:    bg.save(tfname)
57:
58:  # Put the image on the clipboard and delete the temporary file.
59:  impbcopy = os.environ['HOME'] + '/Dropbox/bin/impbcopy'
60:  subprocess.call([impbcopy, tfname])
61:  os.remove(tfname)
As you can see from the import lines at the top, this script uses two nonstandard libraries: Pashua and Image.
The Pashua library provides the interface to Carsten Blüm’s Pashua application. This is a great little utility for adding simple GUIs to scripts. It’s similar in many ways to Platypus, but I find it generally easier to use.
The Image library is one of the modules in the Python Imaging Library (PIL), the old standby for image editing in Python. PIL is what I use to add the border to the screenshot.
Lines 9–14 define the parameters that govern the specifics of the rest of the program: the image format for the screenshot, the location and name of the temporary image file, and the size and color of the border.
Lines 16–32 specify the layout of the window shown above.
Line 36 captures the image by running OS X’s screencapture command. I have the options set to start the process in window capture mode, but it’s easy to switch to rectangle capture mode by pressing the space bar. Because it might need to add a border, SnapClip saves the captured image to disk using the temporary file name defined in Line 12.
Lines 43–47 put up the window and collect the user input. If I click the “Background border” checkbox, Lines 49–56 open the image file, add the border, and save the edited file back to disk.
Finally, Lines 58–61 put the image on the clipboard and clean up by deleting the temporary image file. I use Alec Jacobson’s impbcopy command line tool for this. It’s a clever little program that mimics the builtin pbcopy command, but for image data instead of text.
While this is not quite as efficient as the standard ⌃⇧⌘4 keyboard combo when I don’t want a border (it requires an extra tap on the Return key), it’s far easier to use when I do. And I prefer to remember just one keyboard combination for putting screen captures on the clipboard.
