A little tagging automation
October 7, 2018 at 6:36 PM by Dr. Drang
I resisted tagging my files for quite a while. Why bother with tags when we already have a hierarchical file system for our first method of organization and hard links when we need another method? But I’ve come around to using tags, partly because I got used to them on iOS and partly because the advantages of hard links are lost when you use a cloud system like Dropbox to keep two computers in sync.1 So I’ve gradually developed a set of scripts and macros for dealing efficiently with tags.
I use these automation tools almost exclusively with the photographs I take for work, so I should start by saying that I don’t use the Photos app and don’t ever expect to, despite its internal tools for categorizing photos. The photos I take for work are project- and client-specific. Each project has to be kept separate, and I often need to be able to copy my entire project file for either archiving or sending to a client. Hard experience has taught me that folders of JPEGs are better for my situation than any structure within Photos.
My usual baseline method of organizing photos is to put them in folders according to date. The photos themselves, which come out of the camera with names like IMG_1234.JPG or DSCN1234.JPG, are renamed according to date, photographer, and image number like this:
20181004abc-001.jpg
where “abc” are the initials of the photographer, usually me. The photos are put into folders named according to the date using the same yyyymmdd format as the file name prefix. On small projects with only a few dozen photos, this is sufficient, and my photo organization starts and ends with a system like this:
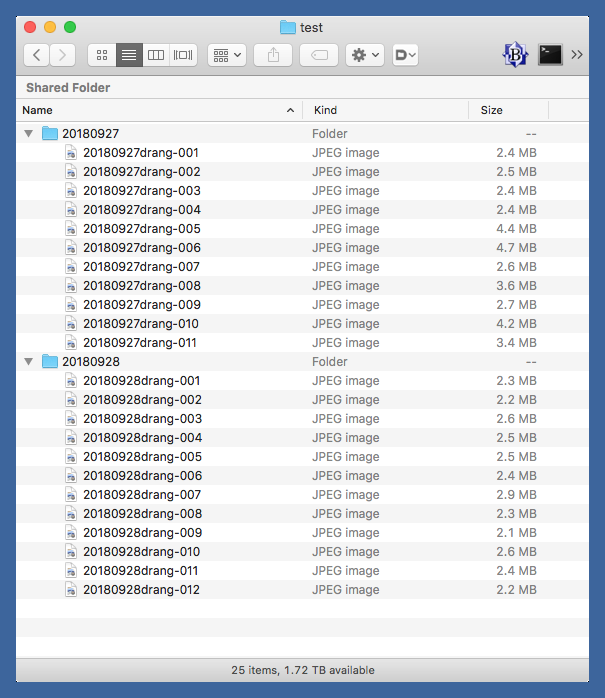
But when I have a more complex set of photos, and particularly when I have photos of many objects that have to be analyzed separately (residential units in a building, machine parts, chunks of an exploded boiler, etc.) its useful to have them also organized by object. The key here is “also”—I don’t want to lose the date organization, I want object organization in addition to date organization.
The natural way to do this on a Mac is to use tags. There’s a nice command-line tool called tag, written by James Berry, that does pretty much whatever you might want with tags: adding, removing, listing, and finding files. If you use Homebrew, you can get it via brew install tag.
I have a Keyboard Maestro macro that uses tag. When I want to organize photos by object, I open a Finder window for one of my dated photo folders in icon view with the icon size set large enough for me to identify the photo subject(s). I then work my way through the folder, selecting photos and calling the macro with the ⌃⇧T keystroke. This brings up a window with a selection box listing the tags I can apply. I select one or more tags, hit the OK button, and move on.
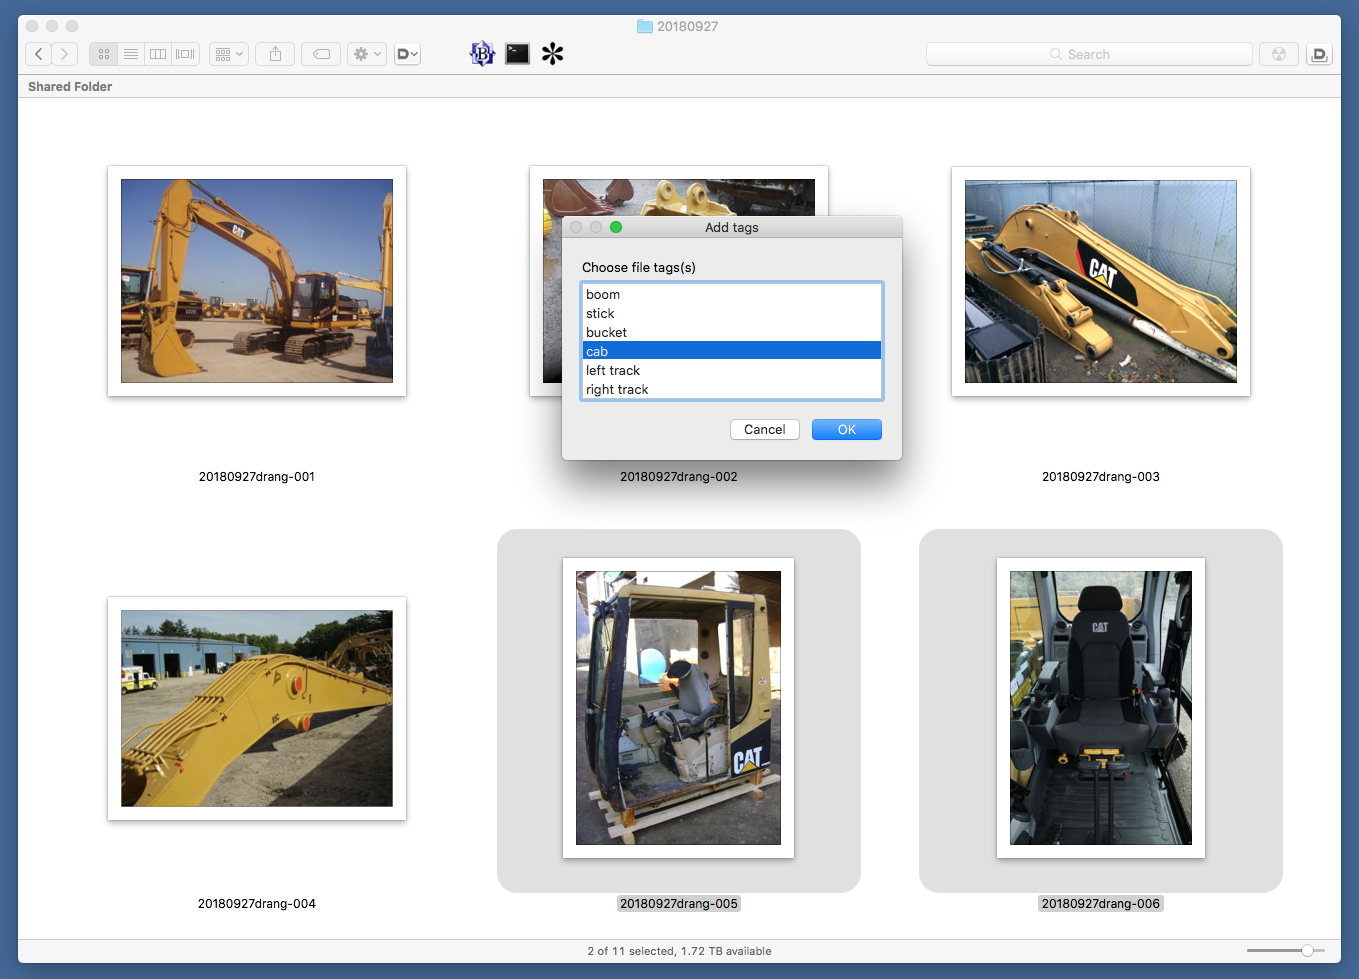
Here’s the Keyboard Maestro macro that does the work,
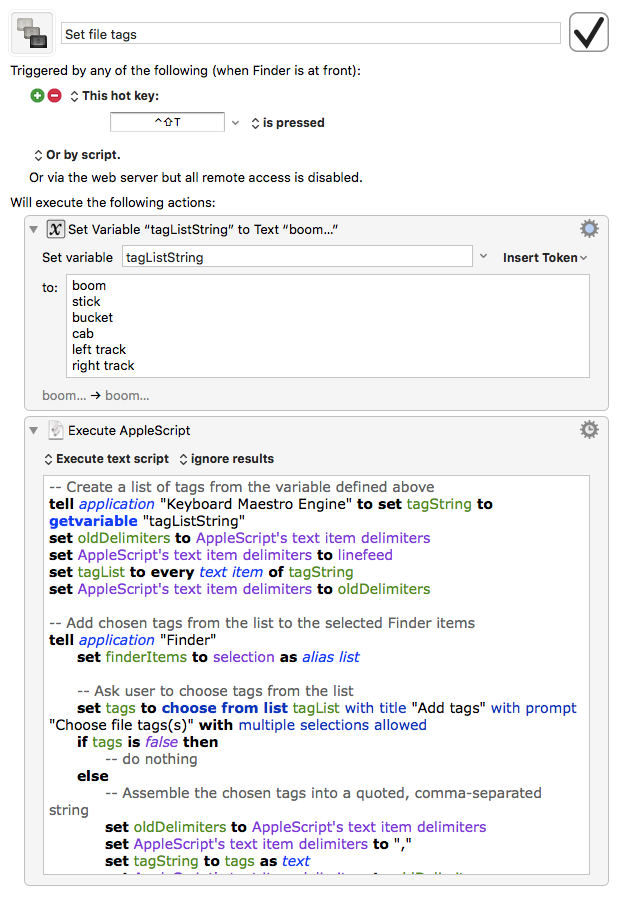
which you can download and edit for your own use.
The first step defines a list of tags, one per line. I change this for every project. The second step is an AppleScript that takes those tags, uses them to create the window with the selection box, and then applies the chosen tags to the selected files. Here’s the AppleScript in full:
applescript:
 1:  -- Create a list of tags from the variable defined above
 2:  tell application "Keyboard Maestro Engine" to set tagString to getvariable "tagListString"
 3:  set oldDelimiters to AppleScript's text item delimiters
 4:  set AppleScript's text item delimiters to linefeed
 5:  set tagList to every text item of tagString
 6:  set AppleScript's text item delimiters to oldDelimiters
 7:
 8:  -- Add chosen tags from the list to the selected Finder items
 9:  tell application "Finder"
10:    set finderItems to selection as alias list
11:
12:    -- Ask user to choose tags from the list
13:    set tags to choose from list tagList with title "Add tags" with prompt "Choose file tags(s)" with multiple selections allowed
14:    if tags is false then
15:      -- do nothing
16:    else
17:      -- Assemble the chosen tags into a quoted, comma-separated string
18:      set oldDelimiters to AppleScript's text item delimiters
19:      set AppleScript's text item delimiters to ","
20:      set tagString to tags as text
21:      set AppleScript's text item delimiters to oldDelimiters
22:      set tagString to quote & tagString & quote
23:
24:      -- Add the tags to each file in turn
25:      -- The `tag` command is from https://github.com/jdberry/tag
26:      -- It can be installed via `brew install tag`
27:      repeat with p in finderItems
28:        set cmd to "/usr/local/bin/tag --add " & tagString & " " & quote & (POSIX path of p) & quote
29:        do shell script cmd
30:      end repeat
31:
32:    end if
33:  end tell
Much of the script’s length is due to AppleScript’s clumsy tools for moving between lists and strings. The script works like this:
- Lines 2–6 import the list of tags defined in the first step (which come in as a string) and convert them into an AppleScript list through the ol’
text item delimitersshuffle. - Line 10 gets the list of files selected in the Finder.
- Line 13 asks the user which tags to apply to the selected files, using the
tagListdefined in Line 5. Selecting more than one tag is allowed, which is important, as my photos of machinery often include more than one part. - If the user cancels (Line 14), the script does nothing. Otherwise…
- Lines 18–22 do the reverse
text item delimitersdance to turn the list of tags chosen by the user into a string of tags separated by commas. This is the format thetagprogram wants. Lines 27–30 then go through each of the selected files and add the tags. Line 28 sets up a
tagcommand that looks like this:tag --add "tag A,tag B" "Photo 27.jpg"to apply the tags. The quotes are needed because both the tag list and the file name can have spaces that need to be protected from shell interpretation. The command is then run by
do shell scriptin Line 29.
After the tags are applied, I can use Smart Folders keyed to a particular tag to collect all the photos of that object in one spot. Unfortunately, making a Smart Folder that searches for tags involves more scrolling and clicking than I can tolerate.
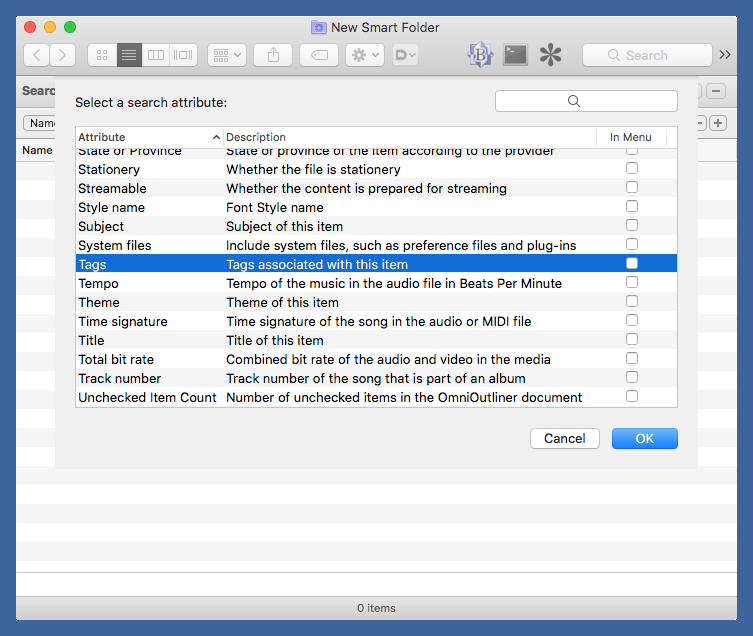
So I wrote a command-line script called mktagdirs to do it for me. Running it from the directory that contains all the dated photo subdirectories results in a new Smart Folder for each tag.

Here’s the Python source code for mktagdirs:
python:
 1:  #!/usr/bin/python
 2:
 3:  import plistlib
 4:  import sys
 5:  import os
 6:  import subprocess as sb
 7:
 8:  # The tag command can be found at https://github.com/jdberry/tag
 9:  # This is where I have it installed (via `brew install tag`)
10:  tagCmd = '/usr/local/bin/tag'
11:
12:  # Get the working directory and all of the tags in files under it
13:  cwd = os.getcwd()
14:  tagString = sb.check_output([tagCmd, '--no-name', '--recursive']).strip()
15:  tagString = tagString.replace(',', '\n')
16:  tags = set(tagString.split('\n'))
17:
18:  for t in tags:
19:    # Build the dictionary for the smart folder
20:    rawQuery = '(kMDItemUserTags = "{}"cd)'.format(t)
21:    savedSearch = {
22:    'CompatibleVersion': 1,
23:    'RawQuery': rawQuery,
24:    'RawQueryDict': {
25:      'FinderFilesOnly': True,
26:      'RawQuery': rawQuery,
27:      'SearchScopes': [cwd],
28:      'UserFilesOnly': True},
29:    'SearchCriteria': {
30:      'CurrentFolderPath': [cwd],
31:      'FXScopeArrayOfPaths': [cwd]}}
32:
33:    # Make the smart folder
34:    plistlib.writePlist(savedSearch, '{}.savedSearch'.format(t))
The first thing to note is that this is using the Python that comes with macOS, which is Python 2.7. This script will not work on recent versions of Python without a little tweaking, because the plistlib module has been rewritten.
The key to understanding mktagdirs is recognizing that Smart Folders aren’t folders at all; they’re just plist files with a .savedSearch extension. It’s the contents of the plist file that determines which files appear when you open a Smart Folder in the Finder.
We’re going to use tag again, this time to gather all the tags of the photo files. Line 10 defines where I have it saved, and Line 14 runs it via the subprocess library. The invocation would look like this on the command line:
/usr/local/bin/tag --no-name -recursive
This returns all of the tags for all of the files within the current directory, including files nested in subdirectories. Each file’s tags are output as a comma-separated list, one line for each file, like this:
boom,bucket,cab,left track,right track,stick
bucket
boom,stick
boom
cab
Lines 15 and 16 take this output and turn it into a Python set called tags, which we start iterating through on Line 17. By using a set instead of a list, repeated entries are reduced to a single item.
Lines 21-31 define a dictionary of the items needed for a Smart Folder. I learned some of this from Kirk McElhearn’s old Macworld article and some from just playing around with the plist of a Smart Folder I’d made “by hand” and seeing what could be deleted without impairing its function. For our purposes, the most import things are the following:
- The SearchScope, CurrentFolderPath, and FXScopeArrayOfPaths items, which we set to the “current working directory,” which is the directory from which
mktagdirswas invoked. - The RawQuery items, which are defined in Line 20 as a
kMDItemUserTagssearch for the tag name. Thecdmeans the search is insensitive to case and diacritical marks.
Finally, Line 34 converts the dictionary to a plist and writes it to disk with a .savedSearch extension.
Now I have a way to look at my photos by date and by subject. Each Smart Folder is populated with the files that have its tag.
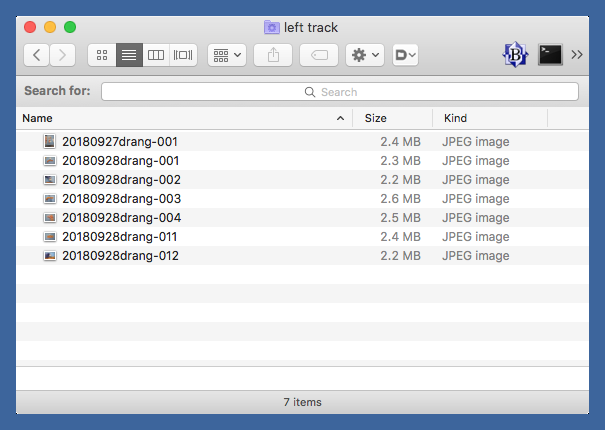
This works well when I’m the only one who needs to see my photos, but not when I have to share them with others. The next post will have a couple of scripts to handle that situation.
-
Dropbox treats the hard links as separate files and uploads them accordingly. So when your other computer downloads files from Dropbox to stay in sync, it downloads multiple copies of each. This means the links are lost and one of your computers is using much more disk space for the files than the other. ↩
