SSH tunneling redux
November 10, 2012 at 10:44 PM by Dr. Drang
Years ago I wrote a post about how I access services on my office computer from my laptop. My setup has changed a bit since then, so it seemed worthwhile to write a short update.
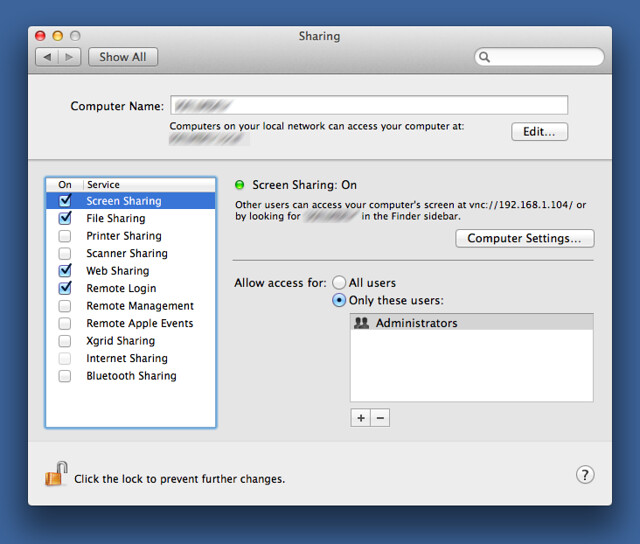
My office computer isn’t generally accessible from the internet, but the office router does have a permanent public IP number and it’s configured to forward calls on the SSH port to my computer, which has an SSH server running by enabling Remote Login in the Sharing Preference Pane. Through a system called SSH tunneling, I can securely access services that run on my office machine by piping them through the SSH protocol. Using a service remotely from my laptop generally consists of two steps:
- Running a script on my laptop that sets up the tunnel.
- Accessing the remote service through whatever application would access it locally.
There are three services I use this way, and therefore three tunneling scripts.
workwiki
I have an administrative wiki running on port 2500 on my office computer. The wiki has pages with information on the equipment we own, commonly- and uncommonly-purchased supplies (with links to online stores), important phone numbers for the services we use, and anything else I want to be able to look up quickly. Most of the times I need the wiki, I’m sitting in my office, but sometimes it’s helpful to be able to get at it from home or the road.
The script that creates the SSH tunnel from my office computer to my laptop is called workwiki and it looks like this:
bash:
#!/bin/bash

ssh -C -L 2500:127.0.0.1:2500 -N drang@1.2.3.4
It’s just a one-liner with some special options to the ssh command. The -C tells it to compress the data on the remote end and uncompress it locally. The -L option and its argument tell ssh to bind port 2500 on my local machine (which always has an IP number of 127.0.0.1) to port 2500 on the remote machine. The -N option tells ssh to just do the forwarding and not execute commands on the remote machine. Finally, there’s my login name and the public IP address for my office computer. Obviously, the drang@1.2.3.4 is fake; the real version of workwiki has my real login name and IP address.
I run workwiki from a Terminal window on my laptop, and then access the wiki pointing my browser to localhost:2500, just as I would if I were sitting at my office Mac. When I’m done with the wiki, I type ⌃C in the Terminal to stop workwiki and close off the tunnel.
workscreen
Occasionally I really need to look at office computer’s screen. For that I use a combination of the Screen Sharing application and a tunneling script called workscreen:
bash:
#!/bin/bash

ssh -C -L 6900:127.0.0.1:5900 -N drang@1.2.3.4
This is also an ssh one-liner. The only difference is in the port numbers. Here, we’re forwarding local port 6900 to remote port 5900, which is the port number Apple chose for screen sharing. I chose 6900 for the local port because I didn’t want to interfere with 5900.1
Update 11/11/12
Look in the comments for a script that establishes the tunnel, launches Screen Sharing, and closes the tunnel when Screen Sharing is quit. See also Alan Schmitt’s Keyboard Maestro macro for doing the same thing.
For this to work, my office computer has to have screen sharing already turned on, which I’ve done through the Sharing Preference Pane.
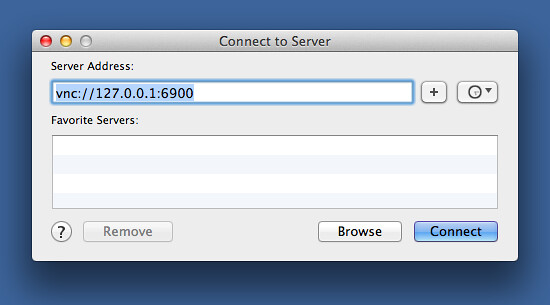
After running workscreen, I open Screen Sharing on my laptop by using the Finder’s Connect to Server… command in the Go menu. The address I connect to is vnc://127.0.0.1:6900, the local port that’s being tunneled to my office computer.
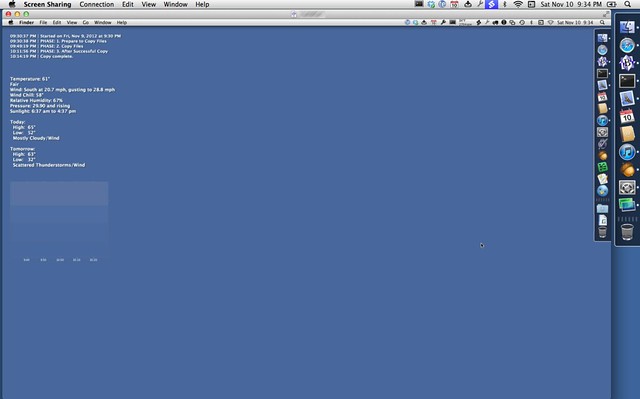
It may seem odd for the “server” in this case to be the local machine, but that’s how it works. Clicking the Connect button launches the Screen Sharing application with the screen of my office computer in the window.
When I’m done working remotely on my office computer, I quit Screen Sharing and ⌃C in the Terminal to stop workscreen and close off the tunnel.
worktunes
Finally, we have the script I use to connect to the iTunes library on my office machine. This was important when my laptop was an iBook with an 80 GB hard disk, and it’s just as important now that my laptop is a MacBook Air with 128 GB of SSD—neither computer has enough storage to comfortably hold my iTunes library, but I still like to be able to play my music when I’m not at work.
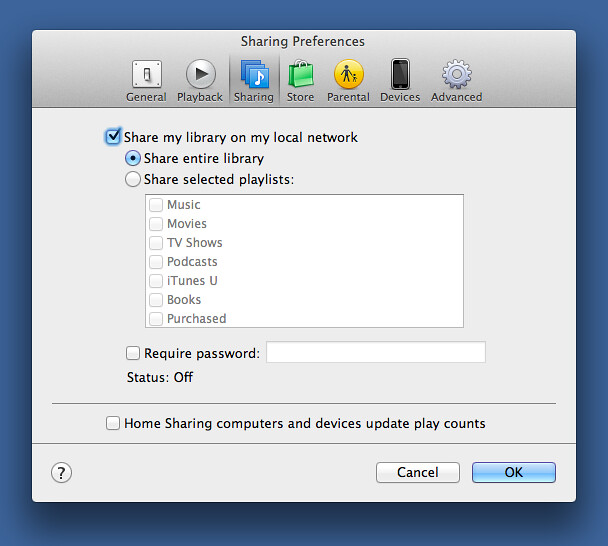
The first step is to configure iTunes at work to share its music and playlists. That’s done in the iTunes Sharing preference.
To stream music from the office, I need to forward the port used by the Digital Audio Access Protocol (DAAP), the protocol Apple uses for iTunes sharing, and set up a proxy for it. The script that does this is called worktunes.
bash:
#!/bin/bash

ssh -C -L 36890:127.0.0.1:3689 -N drang@1.2.3.4 &
trap "kill $!" SIGINT SIGHUP SIGTERM
dns-sd -P "Office iTunes" _daap._tcp local 36890 localhost.local. 127.0.0.1
The first line should be familiar. It establishes a tunnel from remote port 3689 (the DAAP port) to local port 36890 (chosen not to interfere with the local DAAP port). Once upon a time, that was all I needed, as I then used the Network Beacon application to do the proxying. Unfortunately, Network Beacon is no more, so I had to figure out how to do the proxying in the script itself.
As is often the case, “figuring out what to do” really meant “finding and stealing the work of someone else.” The someone else was Robert Harder, whose script bears an uncanny resemblance to mine. Funny, that.
The proxy is set up by the dns-sd command, which routes all calls to DAAP to the local 36890 port—which, in turn, tunnels them to port 3689 on my office computer. There’s a bit of Unix trickiness in putting the ssh command in the background with the & at the end of its line and then using the trap command to cause it to be killed when the script as a whole is stopped with ⌃C.
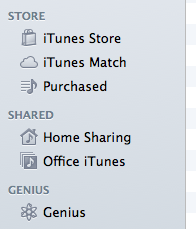
After I run worktunes on my laptop, a new item called “Office iTunes” appears in the Shared section of my iTunes sidebar.
Clicking on it starts a process that loads the metadata from my office iTunes library—which, of course, must be running.
The loading takes 15-30 seconds, and when it’s done I have all my playlists from the office machine available. Any song I choose will stream from work to my laptop.
There are, I’m sure, plenty of other services I could access remotely through SSH tunneling, but these are the ones I use. Tunneling is not only useful, it’s one of those things that makes you feel like you’re living in the future.
-
This is probably unnecessary, as screen sharing is turned off on my laptop, but I didn’t see any reason to take chances. ↩

