Building a tweet in Shortcuts
November 3, 2018 at 10:14 AM by Dr. Drang
I occasionally tweet links to Kindle books that are on sale. Although I do include my Amazon Associate tag in the link so I get a commission on sales, this is not what you would call a significant money maker. The commission on Kindle books is 4%, which amounts to 8¢ on the typical $2 sale price. I do it because I think the people who follow me might be interested in the book.1
In the past, these tweets were purely functional: such-and-such book is on sale for $2—here’s a link to it. I’d use the Associate app—actually its Share Sheet extension—to get the link. A couple of days ago, I decided it would be fun to jazz up the tweet with an image of the book. I already had some Python code that could use Amazon’s product advertising API to get the URL of a book image; I figured it wouldn’t be too hard to jigger with it to pull out the author and title, too, and combine it with a Shortcuts to build a tweet.
Here’s how it works. While I’m on the web page for the book, I invoke Shortcuts from the Share Sheet and choose the Tweet Kindle Book shortcut. This launches Pythonista to extract the relevant information from the Amazon API. At this point, the shortcut gets stuck with my screen showing Pythonista. To get it unstuck, I tap the ◀︎Safari link in the top left corner.

This little kick to get the shortcut going again is needed because Pythonista is not a particularly good iOS automation citizen. It has a URL scheme, which is what allows Shortcuts to invoke it, but it doesn’t implement callbacks, so it won’t automatically return to the app that called it. Pythonista does have ways to jump to other apps, but I haven’t figured out a way to get it to automatically continue this shortcut.
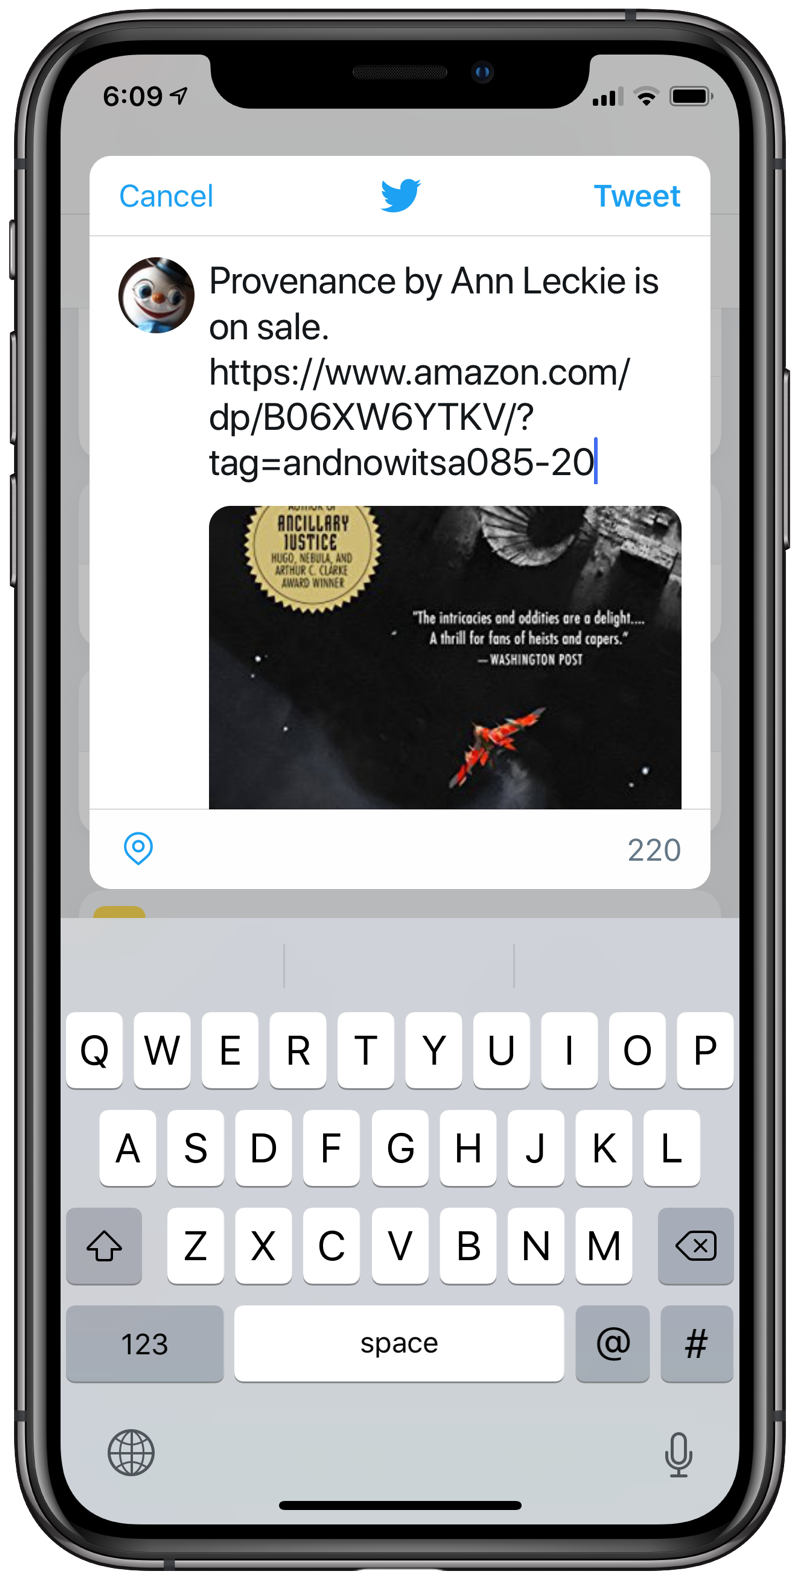
Anyway, after unsticking the shortcut, it assembles the book information into a tweet that I can edit and send.

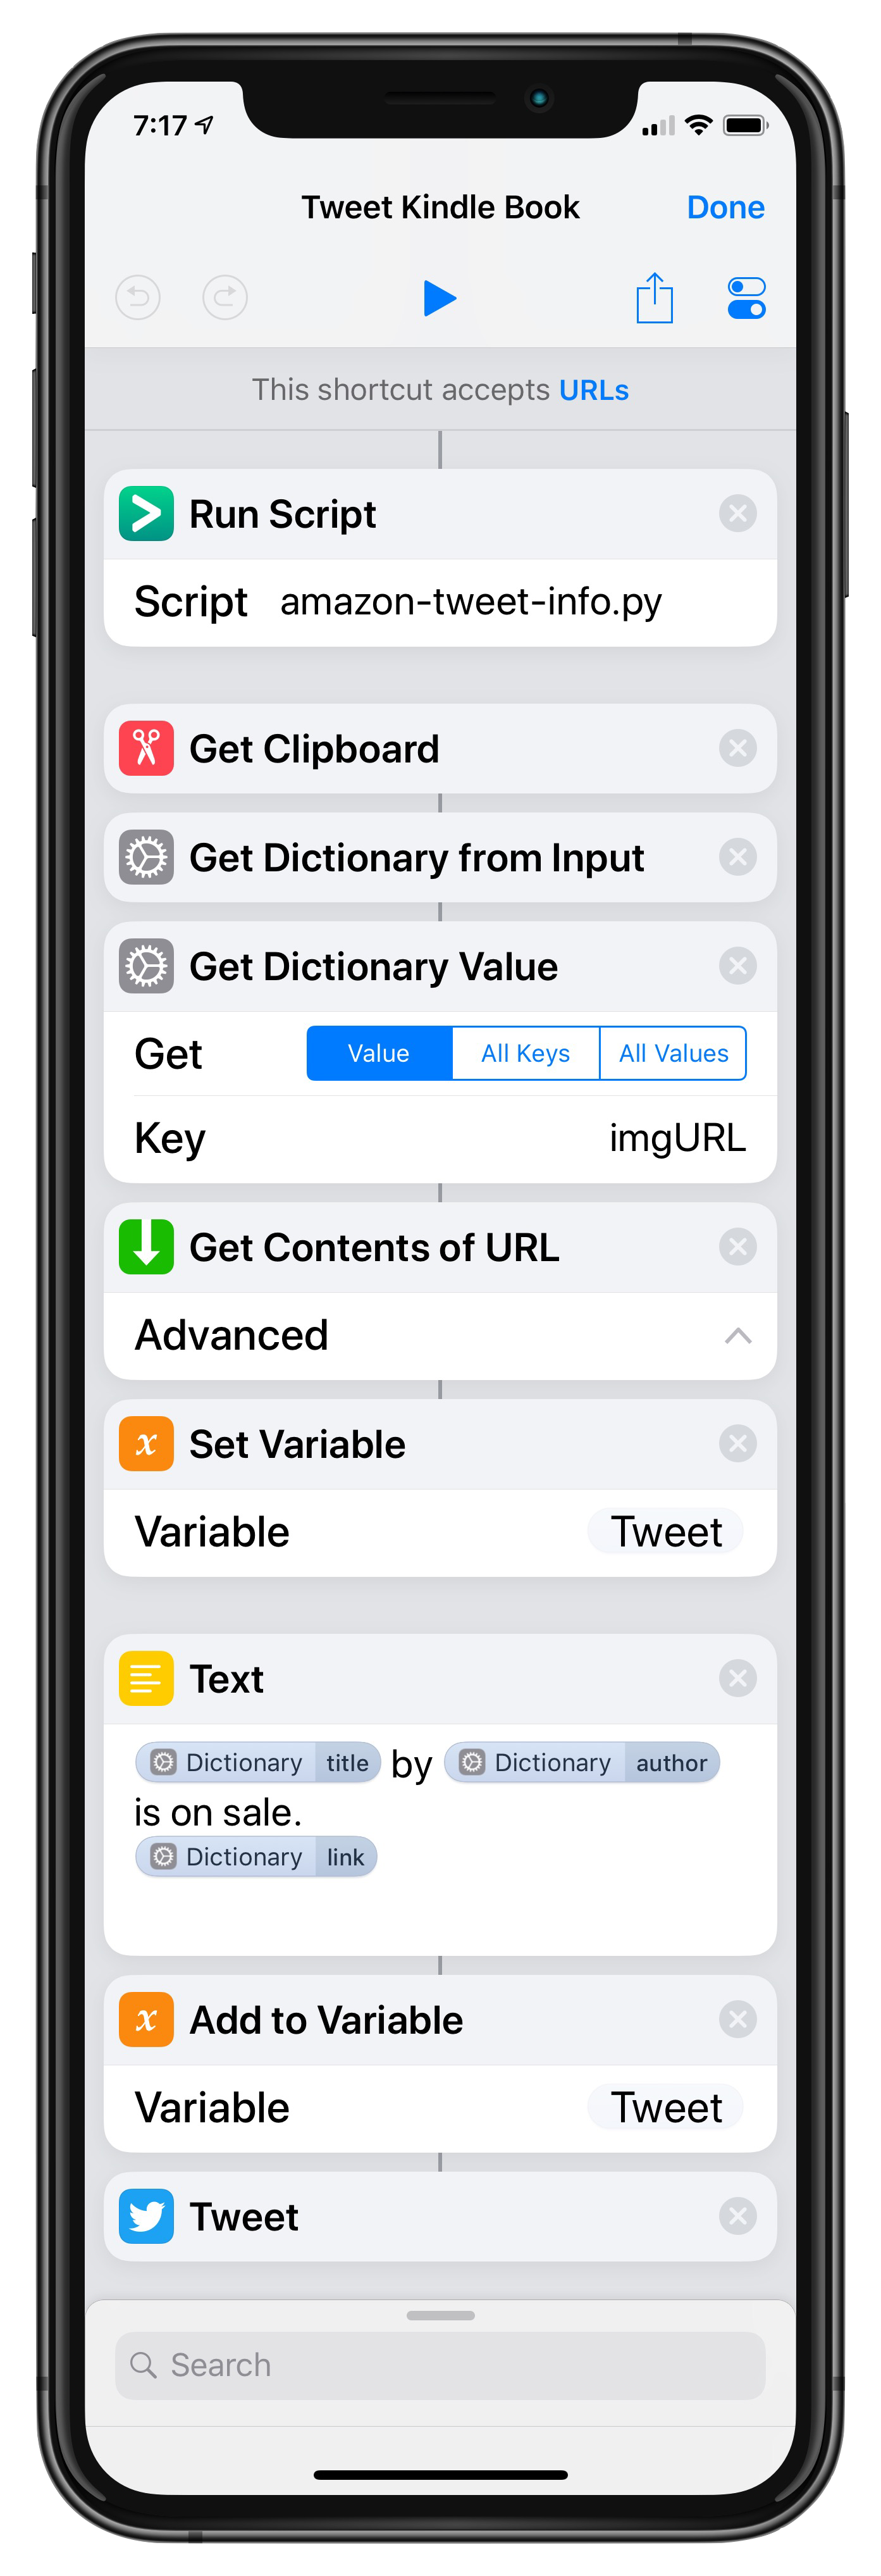
Here are the steps of the shortcut.

The Python script (which we’ll get to in minute) takes the URL of the page being shared as input and puts a JSON dictionary of the book information on the clipboard. For this example, the JSON is
{"title": "Provenance",
 "author": "Ann Leckie",
 "imgURL": "https://images-na.ssl-images-amazon.com/images/I/51EiO-mWOtL.jpg"
 "link": "https://www.amazon.com/dp/B06XW6YTKV/?tag=andnowitsa085-20"}
The Get Dictionary from Input step parses the JSON and turns it into a Shortcuts dictionary, from which we can extract the values. The first thing we do is get the URL of the book cover image and use Get Contents of URL to get the image itself. The image is saved in the variable Tweet.
Next, we assemble the text of the tweet from the other parts of the dictionary and a few linking words. This text is added to the Tweet variable (yes, you can add text to a variable that contains an image—I was surprised at that, too) and the whole thing is finally sent off to the Tweet step. You’ll need to have the official Twitter app installed for the Tweet step to be available.
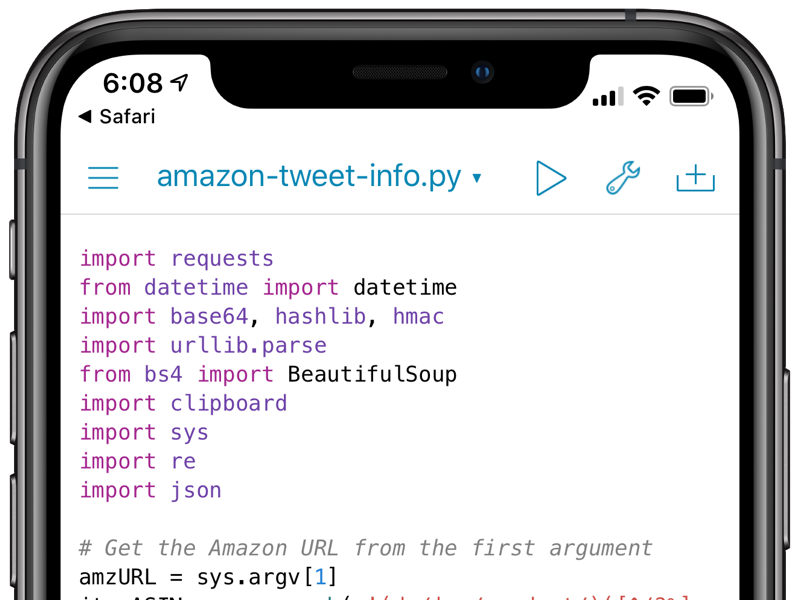
The Python script, amazon-tweet-info.py, is this:
python:
 1:  import requests
 2:  from datetime import datetime
 3:  import base64, hashlib, hmac
 4:  import urllib.parse
 5:  from bs4 import BeautifulSoup
 6:  import clipboard
 7:  import sys
 8:  import re
 9:  import json
10:
11:  # Get the Amazon URL from the first argument and extract the ASIN
12:  amzURL = sys.argv[1]
13:  itemASIN = re.search(r'(dp/|gp/product/)([^/?%]+)', amzURL).group(2)
14:
15:  # Date and time
16:  t = datetime.utcnow()
17:  timeStamp = urllib.parse.quote(t.strftime('%Y-%m-%dT%H:%M:%SZ'))
18:
19:  # Parameters
20:  associateTag = 'yourtag'
21:  accessKey = 'youraccesskey'
22:  secretKey = b'yourlongsecretkey'
23:  parameters = ['Service=AWSECommerceService',
24:     'Operation=ItemLookup',
25:     'ResponseGroup=Large',
26:     'ItemId={}'.format(itemASIN),
27:     'AWSAccessKeyId={}'.format(accessKey),
28:     'AssociateTag={}'.format(associateTag),
29:     'Timestamp={}'.format(timeStamp)]
30:  parameters.sort()
31:  paramString = '&'.join(parameters)
32:
33:  # Generate signature from parameters and secret key
34:  unsignedString = '''GET
35:  webservices.amazon.com
36:  /onca/xml
37:  {}'''.format(paramString)
38:  signedString = hmac.new(secretKey, msg=unsignedString.encode(), digestmod=hashlib.sha256).digest()
39:  sig = urllib.parse.quote(base64.b64encode(signedString))
40:
41:  # Generate URL from parameters and signature
42:  url = 'http://webservices.amazon.com/onca/xml?{}&Signature={}'.format(paramString, sig)
43:
44:  # Get image information
45:  resp = requests.get(url)
46:  xml = resp.text
47:
48:  # Extract the information from from the XML
49:  # response and build a dictionary
50:  soup = BeautifulSoup(xml, 'html5lib')
51:  info = {}
52:  info['imgURL'] = soup.item.largeimage.url.text
53:  info['author'] = soup.item.itemattributes.author.text
54:  info['title'] = soup.item.itemattributes.title.text
55:  info['link'] = 'https://www.amazon.com/dp/{}/?tag={}'.format(itemASIN, associateTag)
56:
57:  clipboard.set(json.dumps(info))
The first item given to it on the “command line” (which in Shortcuts is what flows into the Run Script step) is expected to be the URL of the web page for the book. Lines 12–13 slurp it in and extract its unique Amazon ID, the ASIN.
Lines 16–17 get the current date and time and format it for later use with the API. Lines 20–31 put together all the data needed to make an API request. The associateTag is what you get from Amazon when you sign up for the Associates program. It’s attached to the link URLs that earn you a commission. The accessKey and secretKey are ID strings you get when you sign up for the Product Advertising API. The secret key is defined as a byte string rather than a normal Python 3 string because the encoding that’s part of the signing process (see below) requires a byte string.
Your request to the API has to be “signed” by encoding the request with your secret key. That’s done in Lines 34–39. The details of this are a little hairy, but Amazon explains them pretty well. Line 42 puts everything together into a URL to send to the API.
An important part of the request is the ResponseGroup parameter. There are many response groups available for plucking out different bits of information on a product. As best I could tell from the documentation, the only one that provides all the pieces I want is the Large group. That’s why you see it on Line 25.
Lines 45–46 use the Requests module to send the request URL to the API and get the response, which is in XML format. Lines 50–54 use the Beautiful Soup module to parse the XML and build a Python dictionary with the author, title, and image URL. Line 55 uses the ASIN and the associate tag to create the link entry in the dictionary.
Finally, Line 57 uses the JSON module to convert the Python info dictionary into JSON format and put it on the clipboard. This is the result of the first step of the Tweet Kindle Book shortcut.
This was a relatively simple shortcut to put together, mainly because I already had a Python script written to get the image URL. I just had to figure out which response group also included the author and title data and where they fit within the XML hierarchy.
I’m still a little annoyed about the pause at the Pythonista step. Maybe there’s a trick I don’t know about to get it to return to the shortcut. Or maybe I should consider rewriting that step in JavaScript so I can use Scriptable, which I think is more suited for use as a Shortcuts step.
-
If I’m buying the linked book myself because I don’t already own it, it takes 25 book sales for me to break even. Given how
cheapfrugaldiscerning my Twitter followers are, that many sales is rare. ↩
