Drafts, Shortcuts, and blogging
December 15, 2018 at 12:10 PM by Dr. Drang
For the past several months, almost all of my blog posts have been written on my iPad. My system for publishing the posts, though, was still Mac-based. It consisted of a set of scripts and Makefiles that would compile the Markdown source of the post into HTML and regenerate whatever new pages were needed to update the site. It did all this locally, on the Mac, and then ran rsync to upload the new and altered pages to the blog server. A good system for all those years I was writing posts on the Mac, but less good if I’m going to be writing mostly on the iPad.
To publish a post written on the iPad, I had to get the Markdown source file over to the Mac (Dropbox made this easy) and then I had two choices:
- Leave my iPad, go to the Mac and run the publishing scripts. I almost never did this.
- Log into my Mac from the iPad using Prompt and run the publishing scripts.
The second option, in which the Mac was basically an intermediary between the iPad and the server, seemed like a waste. So a couple of days ago I moved all the publishing scripts and Makefiles to the server, cutting out the middle man.
My publishing system is a melange of Python and PHP—Python because that’s what I prefer scripting in; PHP because this used to be a WordPress site and I have some custom PHP from those days that I don’t want to rewrite. A few Makefiles control the scripts to ensure that only the pages that need to be regenerated are. A system like this runs as easily on Linux as it does on the Mac, so I just had to add a library or two and change a few paths here and there to get everything working on the server. Then it was time to do some scripting on the iPad.
First, I needed to be able to upload a draft from Drafts to the server. I already had a two-step action for uploading a draft to Dropbox, so I was more than halfway there.
The source code for a post starts with a header that looks something like this:
Title: Drafts, Shortcuts, and blogging
Keywords: drafts shortcuts blogging
Summary: A change to how I blog means new Drafts actions that use Shortcuts.
Image: https://leancrew.com/all-this/images2018/20181215-Publish%20shortcut%20options.png
Date: 2018-12-15 12:10:23
Slug: drafts-shortcuts-and-blogging
The name for the Markdown source file and the folder into which it’s saved are determined by the year, the month, and the slug. The first step in my uploading action is this script:
javascript:
 1:  // Set template tags for the path and filename
 2:  // of a blog post.
 3:
 4:  var d = draft.content;
 5:
 6:  // Set up regexes for header info.
 7:  var dateRE = /^Date: (\d\d\d\d)-(\d\d)-\d\d \d\d:\d\d:\d\d$/m;
 8:  var slugRE = /^Slug: (.+)$/m;
 9:
10:  // Get the year and month and set the path.
11:  var date = d.match(dateRE);
12:  var year = date[1];
13:  var month = date[2];
14:  var path = '/path/to/blog/source/' + year + '/' + month + '/';
15:
16:  // Get the filename from the slug.
17:  slug = d.match(slugRE)[1];
18:
19:  // Set tags for use in other action steps.
20:  draft.setTemplateTag('source_path', path + slug + ".md");
This is almost identical to the earlier script, so I won’t describe it in full. The main differences are in Line 14, which defined the path on the server to the folder where the Markdown source files are kept, and Line 20, which defines the source_path template tag that will be used in the second step of the action.
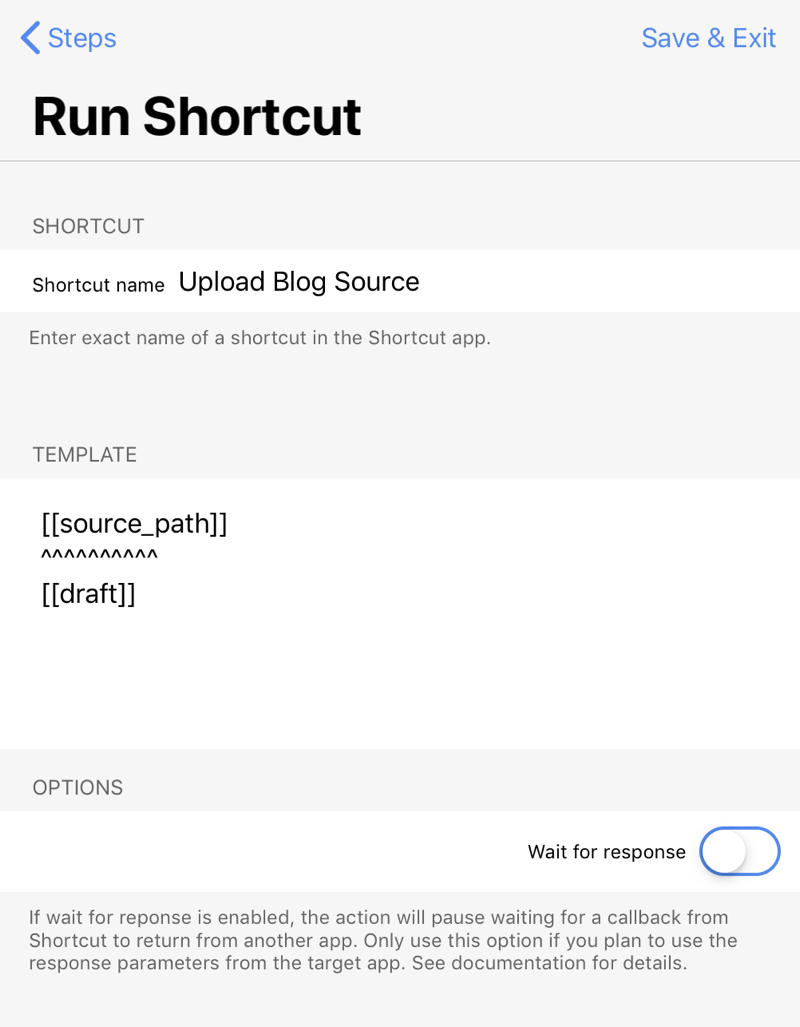
Drafts1 has action steps for easily uploading to Dropbox, Google Drive, One Drive, Box, and WebDAV, but not for uploading via SFTP. I could install Dropbox for Linux on the server or maybe get WebDAV working on it, but I didn’t really want to install new stuff on the server just to be able to upload files. I could also switch to using Coda or some other editor on the iPad that handles SFTP, but I wanted to stick with Drafts. Because I already know how to upload files via SFTP in Shortcuts, I decided to use the Run Shortcut action step:

This step call the Upload Blog Source shortcut (which we’ll get to in a minute) and passes to it the source_path template tag that was defined above, a line of 10 carets, and then the full contents of the current draft. As you can probably guess, the line of carets is there to provide a distinct separator that the Upload Blog Source shortcut can parse.
Speaking of the Upload Blog Source shortcut, here it is:

The second step of the shortcut splits the input text, using ten carets as the separator. This creates a list. The next two steps take the first item of that list, which is the source_path followed by a newline, and strips the trailing whitespace. This output is available to later parts of the shortcut through a magic variable. By default, this magic variable would be named Replace Text, but because there is another Replace Text step in the shortcut, I renamed it sourcePath to avoid confusion. Unfortunately, this renaming is hidden when you take a screenshot of a shortcut, which could be its own source of confusion.
The next three steps return to the list of split items created in Step 2, pull out the last item from it, and strip the leading whitespace. This leaves us with the text of the draft.
Finally, the last step connects to the server and runs the cat command to redirect the standard input passed to the step (the Markdown source) to a file defined by sourcePath.
This is harder to explain than it is to do, but it would be easier if Drafts had a native action step for SFTP. I think I’ll put that bug in Greg Pierce’s ear.
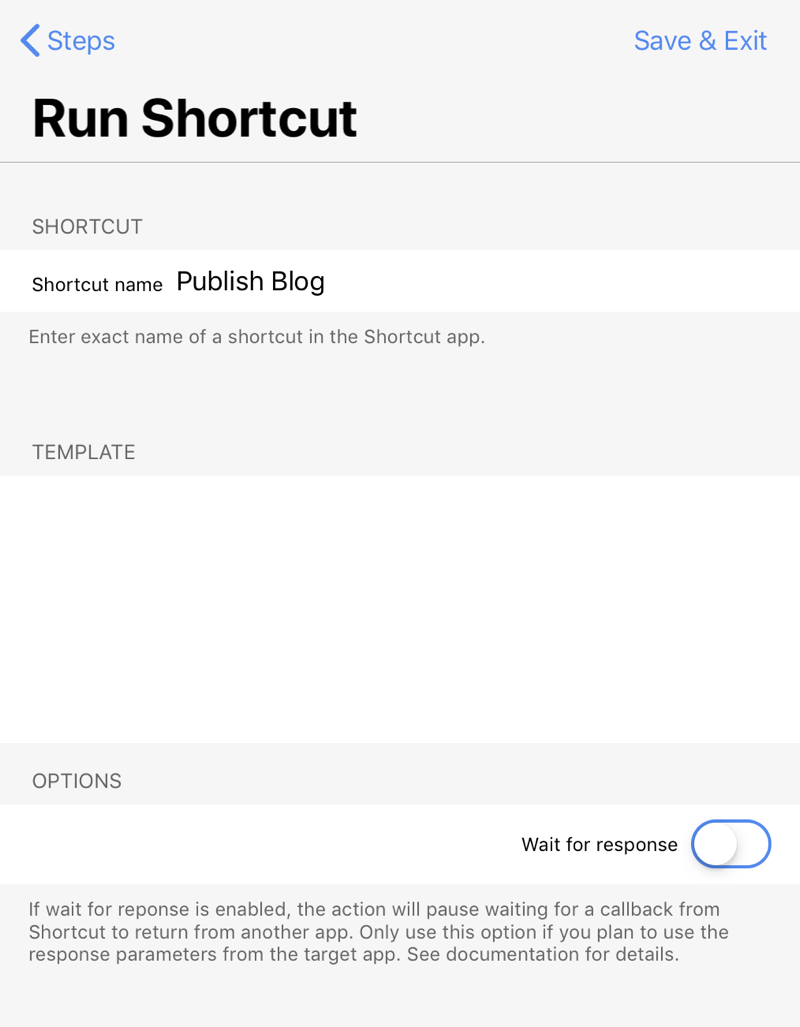
OK, now I have an action that saves a draft to the server. I can use Prompt to log onto the server and run the make command that generates the necessary HTML and publishes the new pages. But wouldn’t it be nicer to just have an action that does that directly from Drafts. Of course it would. This is a single-step action that uses Run Shortcut:

Boy, that’s dull. Here’s the shortcut it runs:

My Makefile has several sections. By default, when make is run without an argument, it runs the sections needed to publish a new post. When given the up argument, it runs the sections needed to update an already-published post. Thats why there are two options to the Publish shortcut.

Many of you are thinking I could have written a shortcut just like this to log in and run make on my Mac, which would have saved me the trouble of moving all my publishing scripts to the server. You’re right, I could have. But I never did because the incentive wasn’t strong enough. It was only after I put the publishing system on the server—something I’ve been meaning to do for longer than I’ve had an iPad—and needed to solve other problems that I felt compelled to write the publishing shortcut. Motivation is funny.
The obvious drawback to setting things up this way is that I’ve now made it harder to blog from my Mac. But BBEdit knows SFTP, so it won’t be hard to teach it how to upload a file to right place. And there are any number of ways on a Mac to run a command on a remote server. I’ll fill those holes soon.
-
Which is, by the way, Time Magazine’s #3 app of 2018. ↩
