
Blogging tweets with AppleScript
October 11, 2010 at 8:37 AM by Dr. Drang
More and more, I’m finding myself wanting to refer to tweets in my blog posts. I like to both link to the tweet and include a screenshot of the tweet itself from it’s Twitter page. In the past, this had been a two step process:
- Grab the screenshot and upload it to the images directory on the server. I use my snapftp for this.
- Generate a link using my Markdown link TextMate snippet and URL-grabbing TextExpander snippet.
This weekend, I realized I could combine these two actions into a single AppleScript (which I run via FastScripts, but could be set up as a Service) triggered by a keystroke combination. The result is something like this,
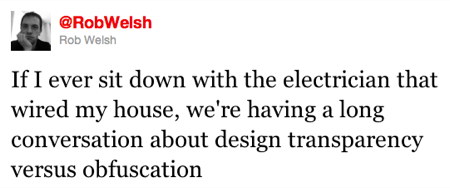
where the image of the tweet is a link to its page and the alt attribute contains the text. The workflow to get this is
- Go to the tweet’s page by clicking its timestamp in home timeline.
- Run the AppleScript by pressing ⌃⌥⌘T. This turns the mouse into a set of crosshairs, just like when you press ⌘⇧4.
- Drag the crosshairs around the tweet. I typically don’t include the meta-information under the tweet itself, but I could if I wanted to. At this point, the image is saved to both my Desktop and the server, and an HTML link and image tag are on the clipboard.
- Switch to my text editor and paste.
The HTML link/image looks like this:
<a href="http://twitter.com/#!/RobWelsh/status/26930752558"><img class="ss" src="http://www.leancrew.com/all-this/images2010/RobWelsh-26930752558.png" alt="If I ever sit down with the electrician that wired my house, we're having a long conversation about design transparency versus obfuscation" /></a>
Yes, I normally write in Markdown, and I thought about doing the link part using its inline link syntax but decided—for now, at least—to use the more generally applicable HTML. I may change my mind after using it for a while.
I pretty much have to use HTML for the image because I assign the ss class to screenshots to get them centered. Markdown’s image syntax doesn’t allow for classes.
As is always the case, describing the workflow is slow but doing it is fast.
Here’s the AppleScript itself, which I call “Tweet screenshot & link” and which is saved in ~/Library/Scripts/Applications/Safari so FastScripts knows that it’s only to be invoked when Safari is the active application.
 1:  tell application "Safari"
 2:
 3:    -- User-specific settings.
 4:    set ftpUser to "username"
 5:    set ftpPassword to "password"
 6:    set ftpURL to "ftp://" & ftpUser & ":" & ftpPassword & "@server.com/public_html/image/directory/"
 7:    set imgURL to "http://www.server.com/image/directory/"
 8:    set imgLocalDir to "~/Desktop/"
 9:    set imgWidth to 450
10:
11:    -- Get the information from the Twitter page.
12:    set tweetURL to URL of front document
13:    set tweetTab to current tab of front window
14:    set tweeter to do JavaScript "$('.permalink-tweet').attr('data-screen-name')" in tweetTab
15:    set tweetID to do JavaScript "$('.permalink-tweet').attr('data-tweet-id')" in tweetTab
16:    set tweetText to do JavaScript "$('.tweet-text-large').text()" in tweetTab
17:
18:    -- Replace double quotes in the tweet text with HTML entity.
19:    set AppleScript's text item delimiters to quote
20:    set theItems to the text items of tweetText
21:    set AppleScript's text item delimiters to """
22:    set tweetText to theItems as string
23:    set AppleScript's text item delimiters to {""}
24:
25:    -- Set the local and remote addresses.
26:    set imgName to tweeter & "-" & tweetID & ".png"
27:    set imgURL to imgURL & imgName
28:    set imgLocal to imgLocalDir & imgName
29:
30:    -- Put the link on the clipboard.
31:    set the clipboard to "<a href=\"" & tweetURL & "\"><img class=\"ss\" src=\"" & imgURL & "\" alt=\"" & tweetText & "\" /></a>"
32:
33:    -- Capture the screenshot and resize it.
34:    do shell script "screencapture -i " & imgLocal
35:    do shell script "sips --resampleWidth " & imgWidth & " " & imgLocal
36:
37:    -- Upload the image file.
38:    do shell script "cd " & imgLocalDir & "; ftp -u " & ftpURL & " " & imgName
39:  end tell
If you want to modify this for your own use, you’d need to edit the stuff in Lines 4-9 to fit your situation. If the content area of your blog is wide enough, you might be able to dispense with the imgWidth variable altogether. I use it because I need to shrink the image a bit to fit it in here.
Lines 12-16 collect information from the tweet page. Most of it is gathered through jQuery calls via do JavaScript. Twitter uses jQuery to do the user interaction, so it’s available to us, too. I learned the class names of the items I needed through the Show Web Inspector command in Safari’s Develop menu.
Update 11/4/10
I changed the class name in Line 16 from tweet-text to tweet-text-large because I found it was collecting all the text of a conversation, not just the permalinked tweet’s.
Lines 19-23 replaces double straight quotes (") in the tweet text with the " entity. Because the alt attribute is enclosed in double straight quotes, they’re not allowed within it.1
Lines 26-28 use the information from the tweet to generate a unique name for the screenshot. The default format for the screencapture utility—which we’ll get to in a minute—is PNG, so that’s why the filename gets the .png extension.
Line 31 assembles the link/image tag set and puts it on the clipboard. This is a line you will almost certainly have to edit to fit your exact needs, but the basic structure of it shouldn’t change.
Line 34 takes the screenshot. It turns the pointer into crosshairs and waits for you to drag out your selection. When you’re done, it saves the image to your Desktop (or wherever you designated in Line 8). Line 35 resizes the image to whatever width you chose in Line 9. As I hinted at earlier, if you don’t need to resize the screenshot, you can comment out this line.
Update 10/11/10
I realized later that the resizing could have been done in a more AppleScripty way via Image Events instead of jumping out to the shell. I used sips because that’s what I’m familiar with from my earlier screenshot script.
Finally, Line 38 FTPs the image file to the server so the URLs in Line 31 have something legitimate to point to.
Sadly, this script can’t be adapted to Firefox or Chrome because they just don’t have the necessary AppleScript support. It might be adaptable to Camino, but I leave that as an exercise for the reader.