
150 dpi Automator Service
May 18, 2012 at 11:48 AM by Dr. Drang
A few years ago, I made a ColorSync PDF filter that downsampled the bitmapped images inside PDFs to make the file size smaller (for emailing) while still providing a good looking printed output. Because of changes in the way Lion handles these filters, I’ve created a Service in Automator to make my workflow smoother.
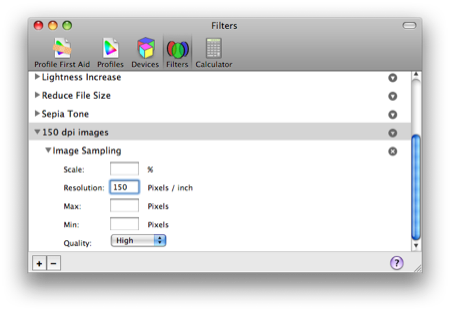
You can see my motivations for creating the filter by reading the old post. Briefly, my reports for work often include photographs that are at a much higher resolution than is necessary. This bloats the PDF files and makes them hard to email to my clients. The filter, created in the ColorSync Utility, goes through a PDF and downsamples all images to 150 dpi, a resolution that looks fine on paper and allows a bit of zooming on screen.
In pre-Lion versions of OS X, I could open the bloated PDF in Preview, choose Save As from the File menu and apply the filter via the Quartz Filter popup menu.
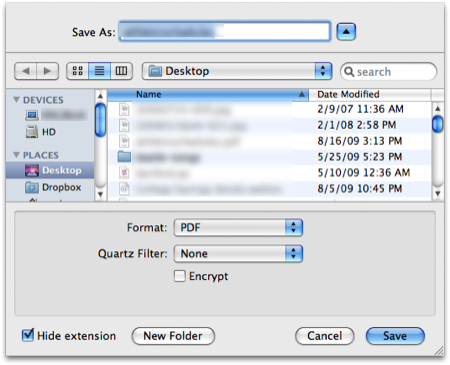
There is, of course, no Save As anymore in Preview. There is an Export menu item, and it has the Quartz Filter popup menu, but for some reason my 150 dpi filter doesn’t appear in the menu on my MacBook Air, even though I have it saved in the ~/Library/Filters folder. Adding to the mystery, the 150 dpi filter does show up in the menu on my iMac, and I don’t see any difference in the way the two machines are set up.
Even on the iMac, using Export to reduce the size of the file is a little clumsy. A smoother technique that will work on both computers is to use a Service that applies the filter and reduces the file size in place. Here’s how I built the Service in Automator:

Now I can right-click on the bloated PDF in the Finder and choose 150 dpi images from the Services submenu. A few seconds later the PDF is nice and trim. I just used it this morning to cut a 55 MB file down to 6 MB.