Speedier Acorn filter with Keyboard Maestro
January 11, 2014 at 10:01 PM by Dr. Drang
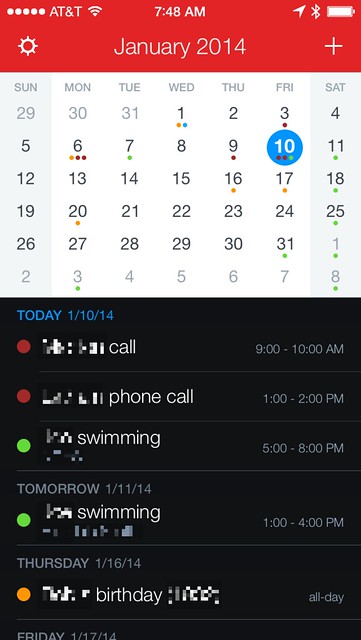
I used to use Acorn’s Motion Blur filter to obscure personal information in screenshots, but I often couldn’t find a combination of settings that would be blurry enough to be unreadable while still looking like something other than a bunch of thin, streaky lines. And when I did find settings that worked reasonably well with one font size they wouldn’t work at all with others. I’d end up spending more time fiddling with a screenshot than writing about it. So I’ve been trying out pixellation instead, and I think I’ve hit on a set of parameters that work well under enough circumstances to be put into a Keyboard Maestro macro. Now I can just select the information I want to obscure, hit ⌃⌥⌘P, and the pixellation is done quickly and automatically.
Pixellation is used frequently enough in news footage and other video that it instantly registers as “hiding personal information” with most people. That’s probably why Marco Arment included it in Bugshot.1 A lot of people have made a good living copying Marco; why shouldn’t I jump on the bandwagon?
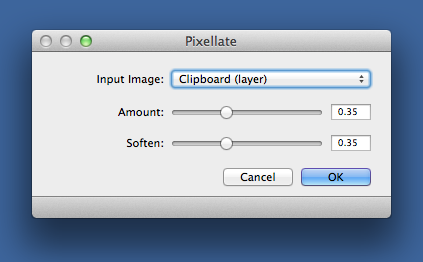
Acorn has two Pixellate filters, one under and the other under . It’s the latter that I found most useful. When invoked, it brings up a control window with two sliders for setting the amount of pixellation (basically, the size of the squares) and the degree of softening, which rounds the corners of the squares.
The values shown above, 0.35 for both Amount and Soften, are the defaults, which don’t produce an image I like. I find an Amount of 0.15 and a Soften of 0 work well. (The Input Image will be set to the currently selected layer. “Clipboard” happened to be the name of that layer when I took the screenshot.)
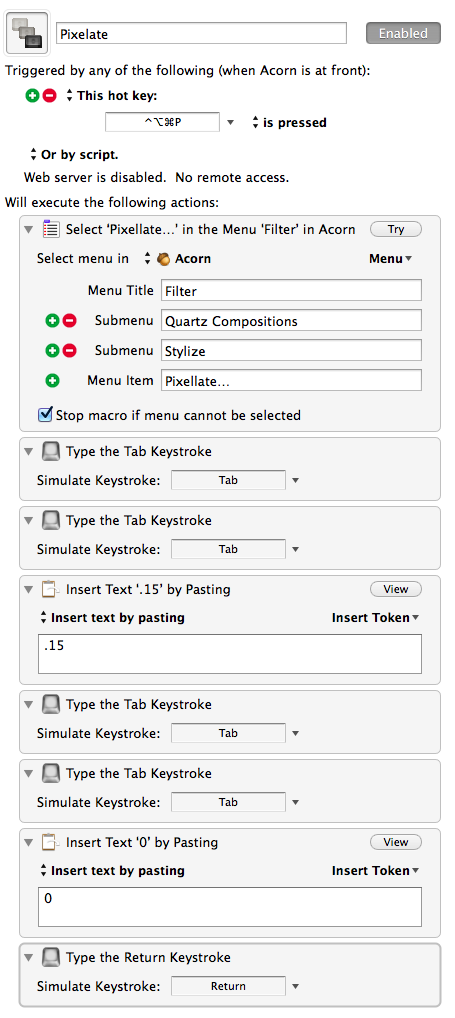
I could, of course, use OS X’s built-in system2 to assign a keyboard shortcut to the menu item, but because Acorn doesn’t remember the filter’s settings from one use to the next, I’d have to keep my favorite settings in my head and enter them every time. That’s not very appealing or very automated, so I went with Keyboard Maestro instead. Here’s the macro:
The hardest thing about defining this macro was remembering how many times I have to tab to move to the two text fields. The macro is easy enough to define by hand, but you can download it from this Gist. It’s just a plist file with a .kmmmacro extension. The same idea could be applied to any filter or filter sequence you expect to use repeatedly.
I suspect that someone who really wanted to could reverse the filter and make the obscured areas readable again. That’s OK. The information I plan to pixellate is personal but not that personal. More important things like account numbers and social security numbers will get fully erased or covered.
One last thing: I know I said I wouldn’t waste your time with simple Keyboard Maestro macros. That may have been a little white lie.
-
I didn’t use Bugshot to pixellate the Fantastical screenshot because I wanted more precision than my fingertip can provide. ↩
-
It’s the App Shortcuts item in the Shortcuts pane of the Keyboard Preference in System Preferences application. I’m beginning to think the Mac’s preference system is nested too deeply. ↩


